Last updated on June 26, 2019
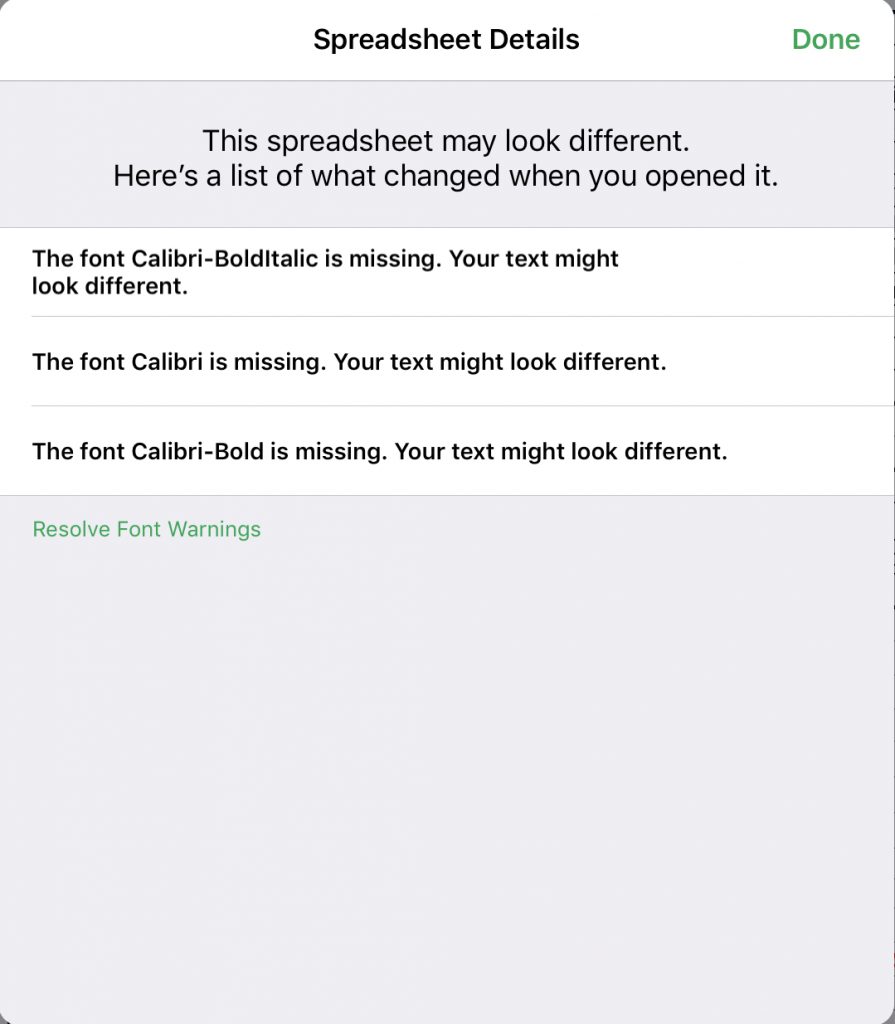
There are situations when you need to open a Microsoft Office file on you iPad. When you did it, a prompt informing you that you do not have the necessary fonts, and the display may look different. On a Mac, you could add additional fonts into the Fonts Library. However, you do not have access rights to the file structure on an iPad. Although there are third party apps that allow you to add fonts to an iPad, you could also do it for free if you have a Mac. To install additional fonts on an iPad, you need to install font profiles on the iPad.
Creating Font Profiles on a Mac
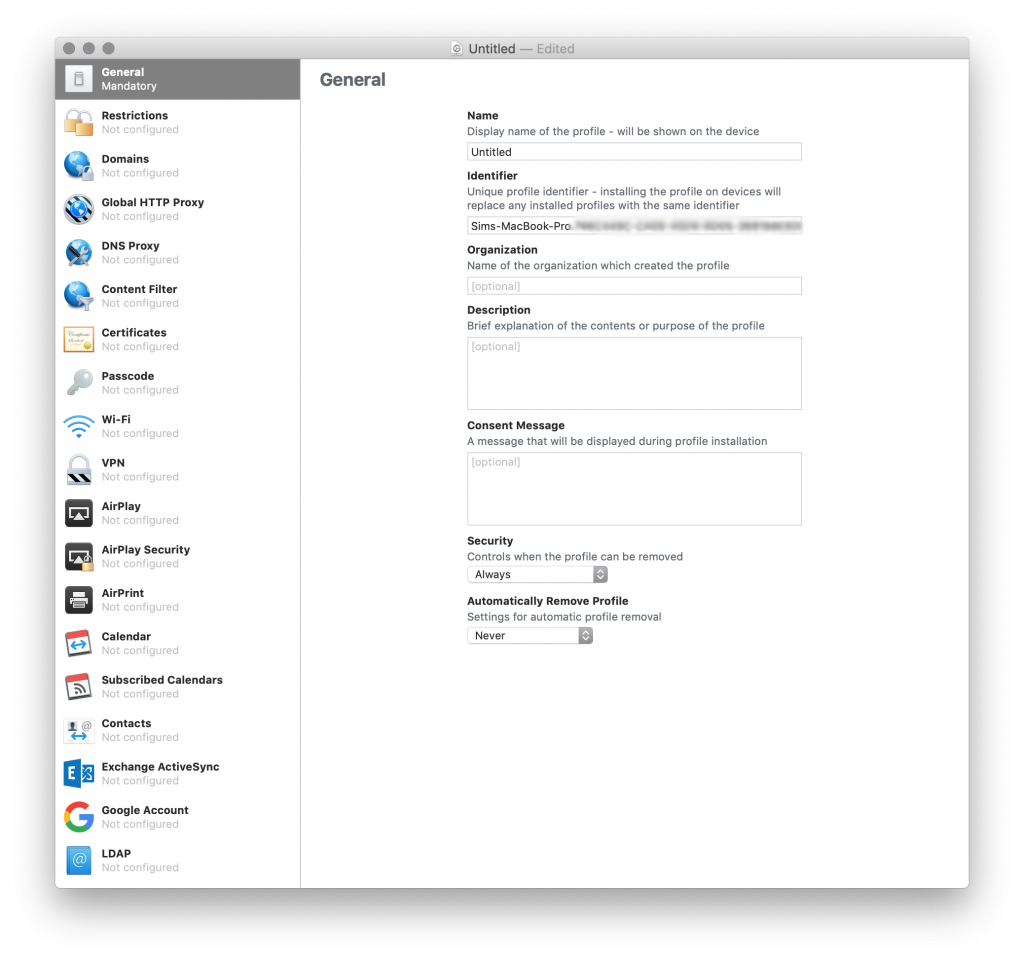
Creating font profiles on a Mac is free using Apple Configurator 2. This app is a free download from the App Store.

To create a font profile, you need to download the fonts to be installed. Next, follow the following steps.
- Run Apple Configurator 2.
- Click File > New Profile.
- Under General, give a name to your profile. You may leave other fields empty.
- Scroll down the left panel until you see Fonts.
- Click Configure and add the font/s that you have downloaded.
- Click File > Save and give a name to your configurator file.
After saving, your configuration profile would look like a gear icon.
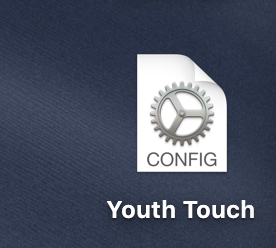
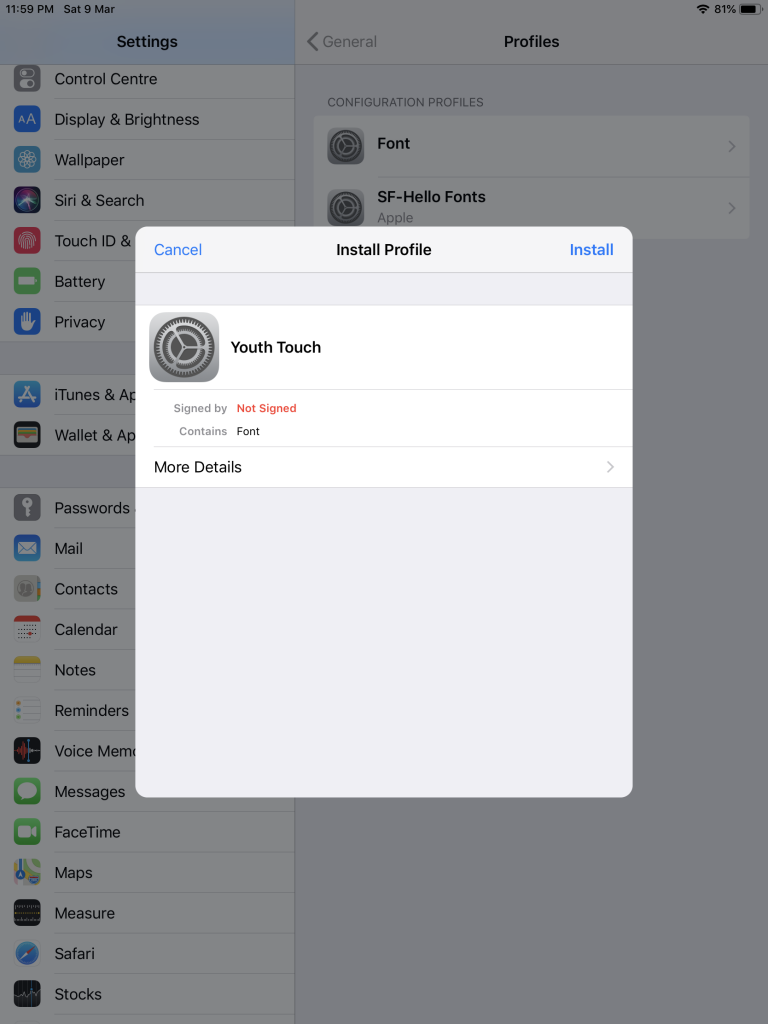
You may then send this profile to your iPad by email or Air Drop. When you open this file on an iPad, it will prompt you to install the profile. Follow through the process and you would install the fonts in your iPad.
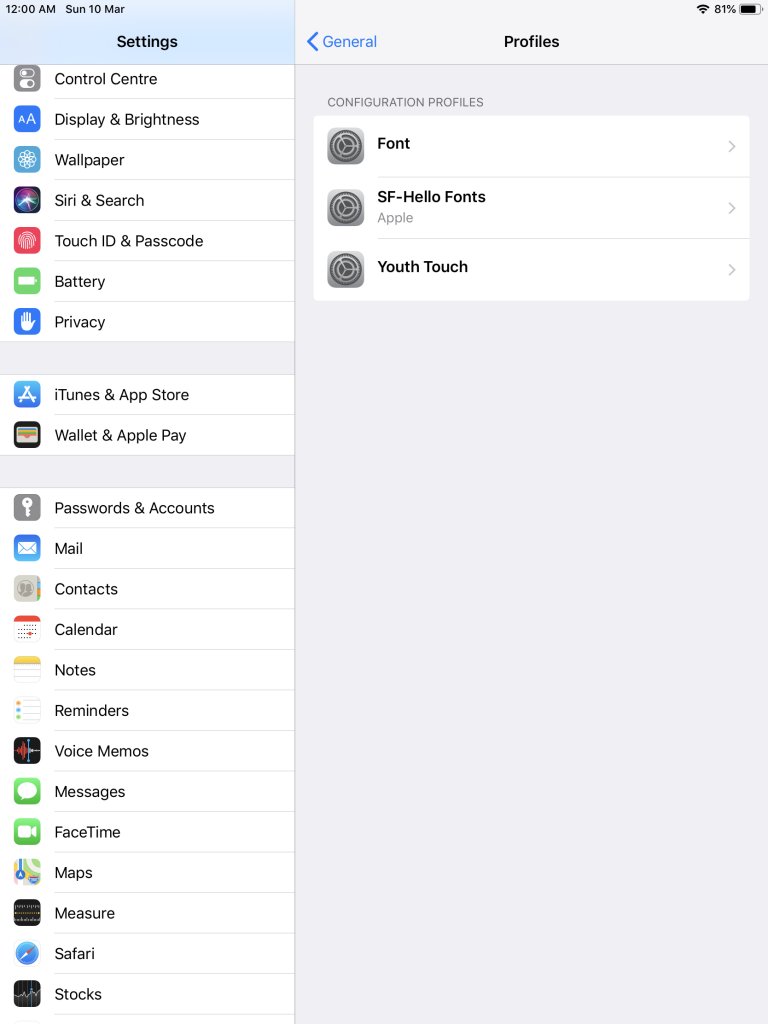
Removing the installed fonts
To remove installed fonts, you just need to uninstall the profiles in Settings > General > Profiles on the iPad.
Update: 8 June 2019
With the latest announcement from WWDC 2019, font management will be coming to iOS 13. You will be able to install fonts from the App Store.