Last updated on February 22, 2020
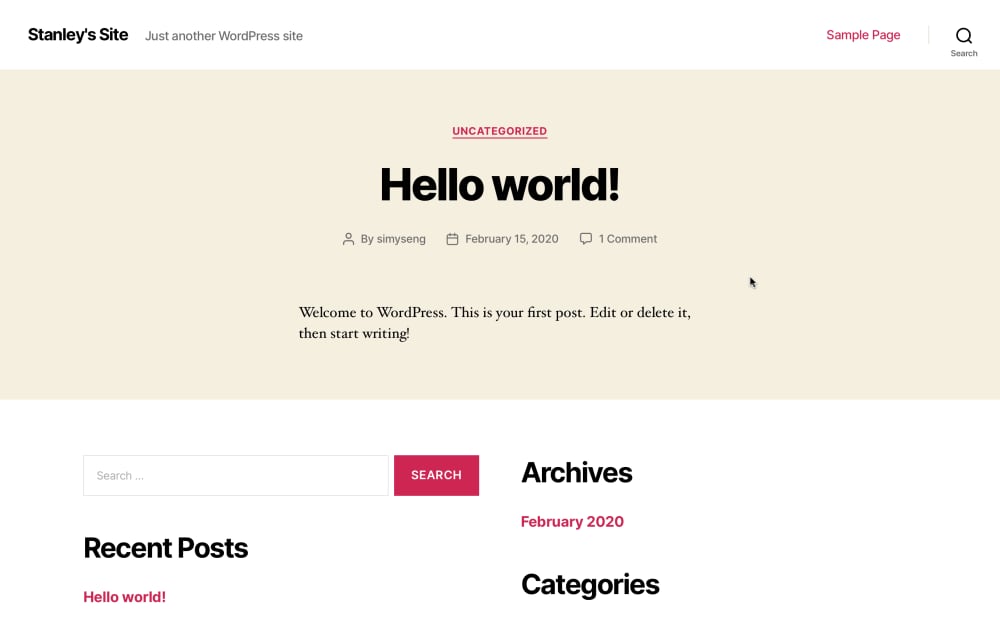
WordPress is the most popular content management system in the world. As on 2020, 35% of all the websites are created with WordPress. WordPress is an easy-to-use blogging system that debut in 2003, and has outgrown to a full-fledge extensible content management system that could be customised into e-commerce platforms.
In this post, I am going to explain how to use Digital Ocean droplets to create WordPress in one click.
Digital Ocean
Digital Ocean is an online provider of cloud services. Web applications hosted on the cloud in the form of virtual private servers (VPS) has some advantages to traditional hosted platforms. One important advantage is that a cloud hosted app could scale easily. This means that if your site is expecting an increase in access during a promotional event, you could easily upgrade your VPS instance to handle the increase in server load.
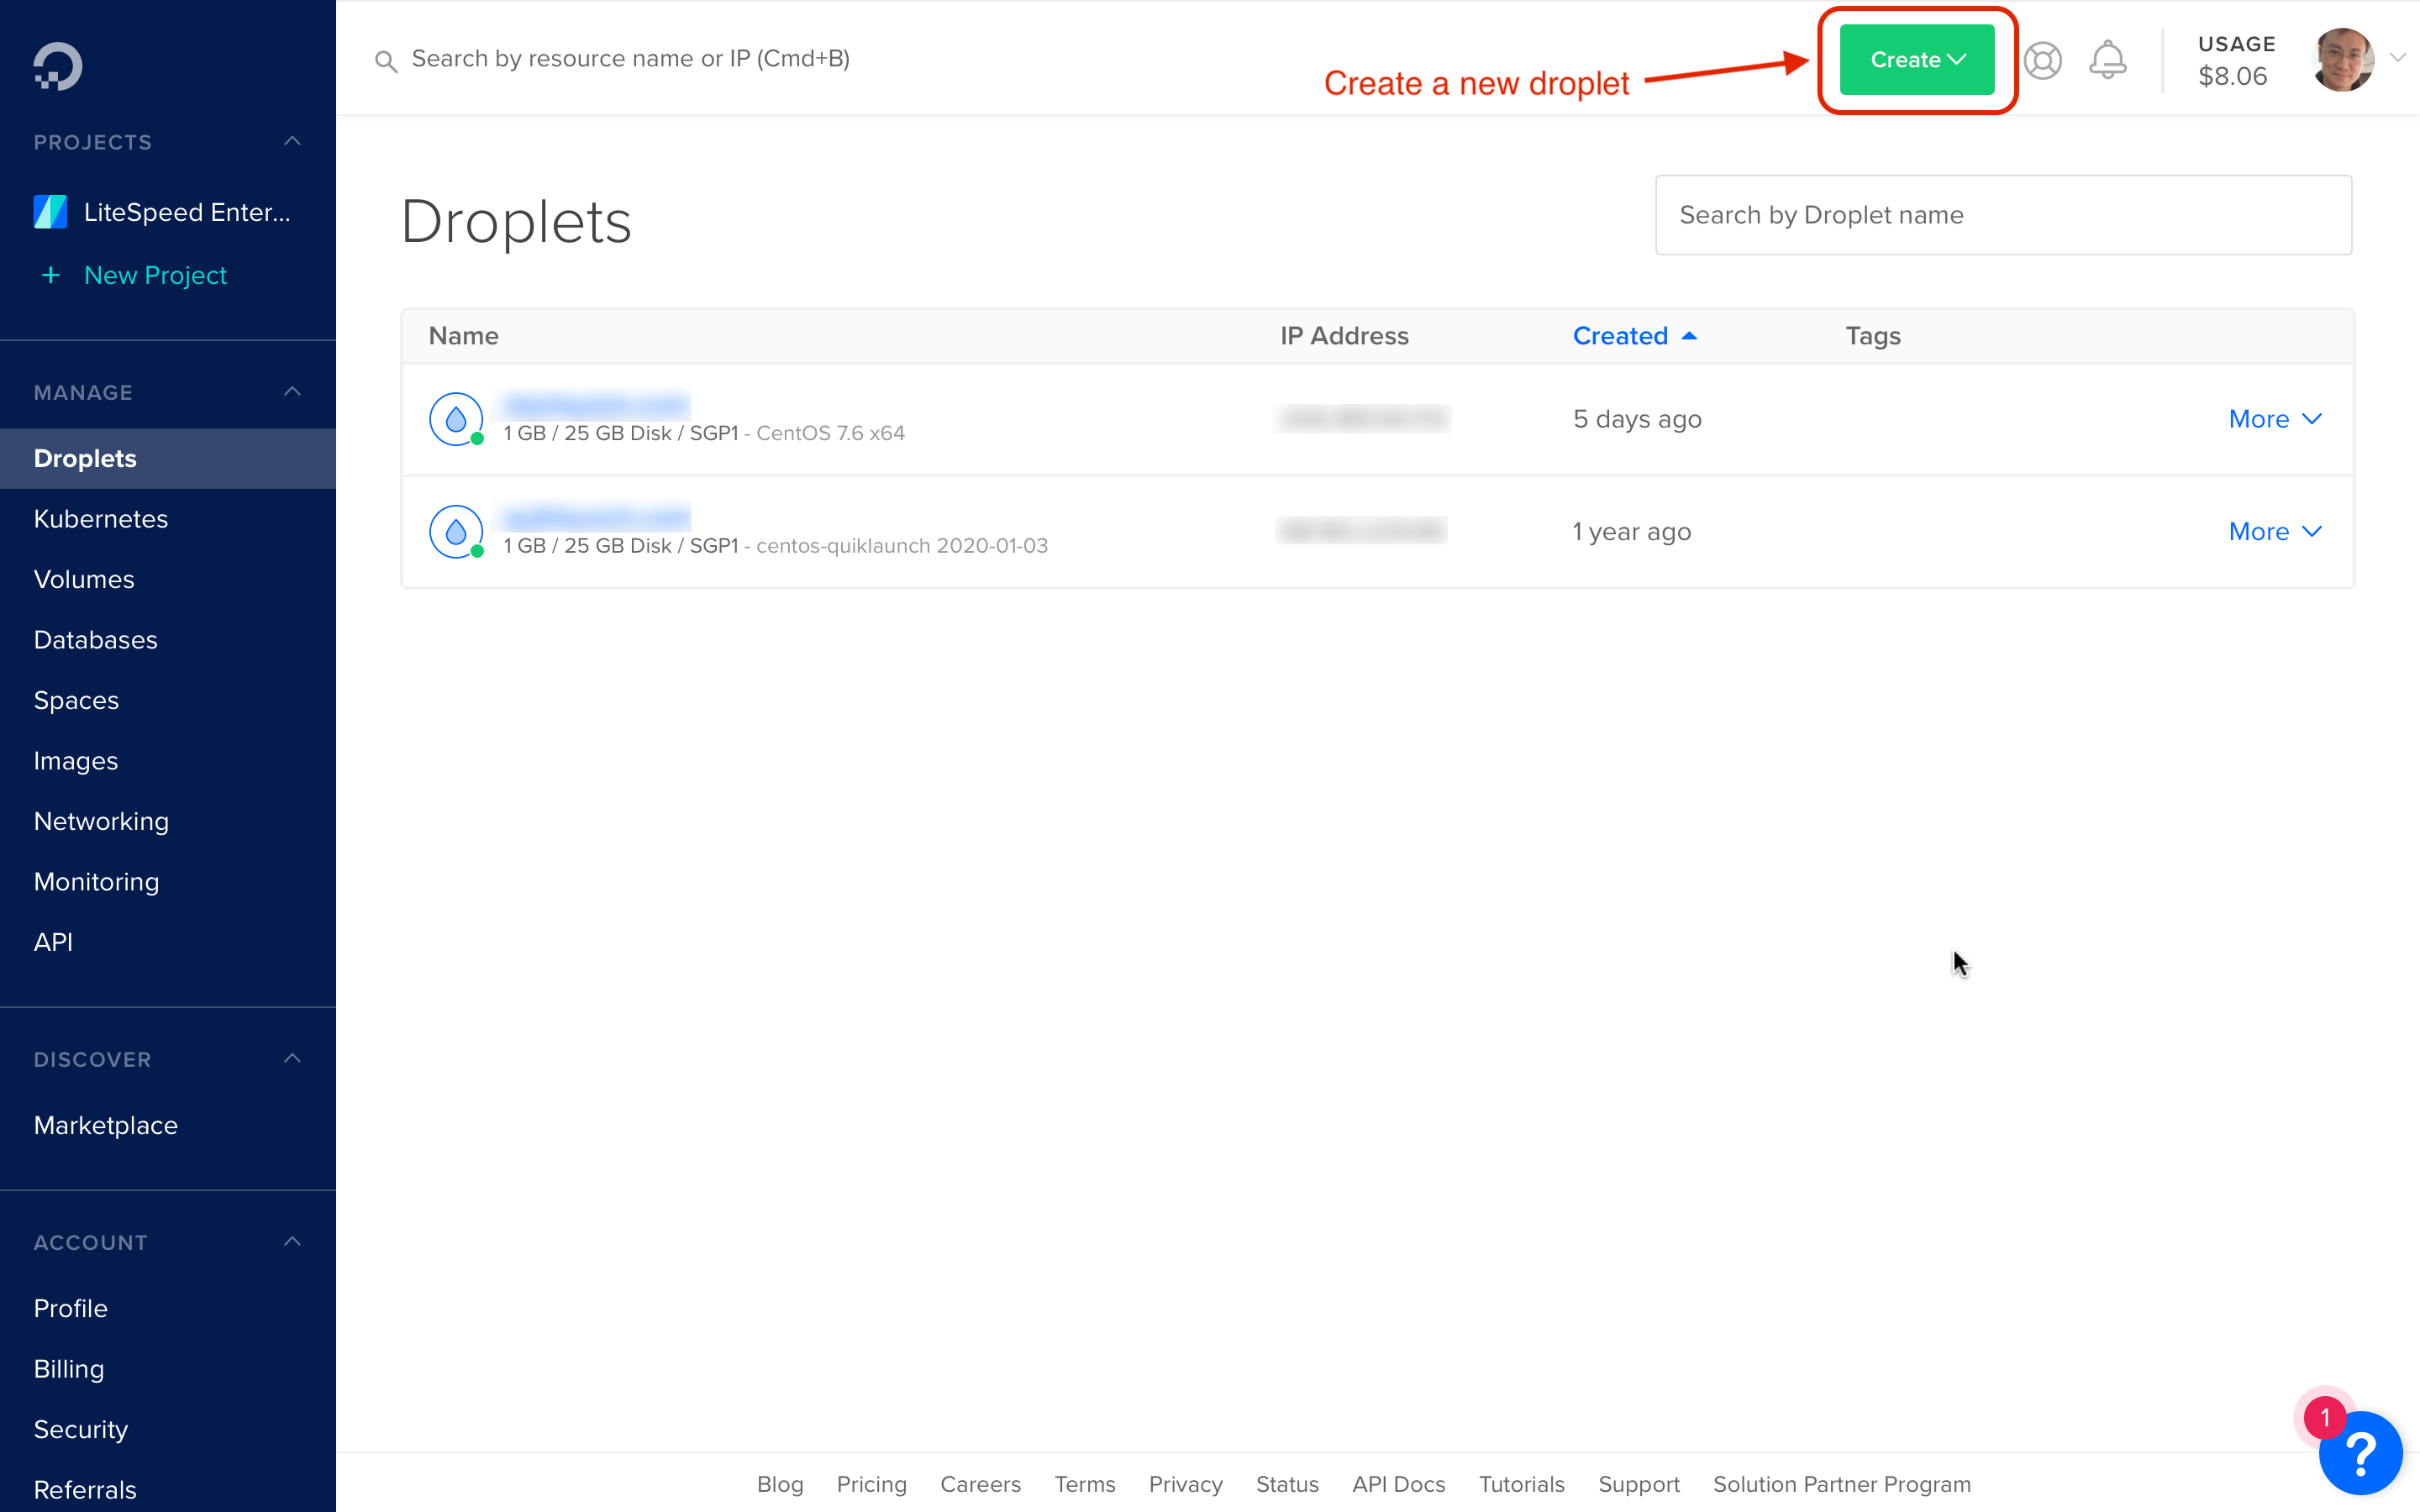
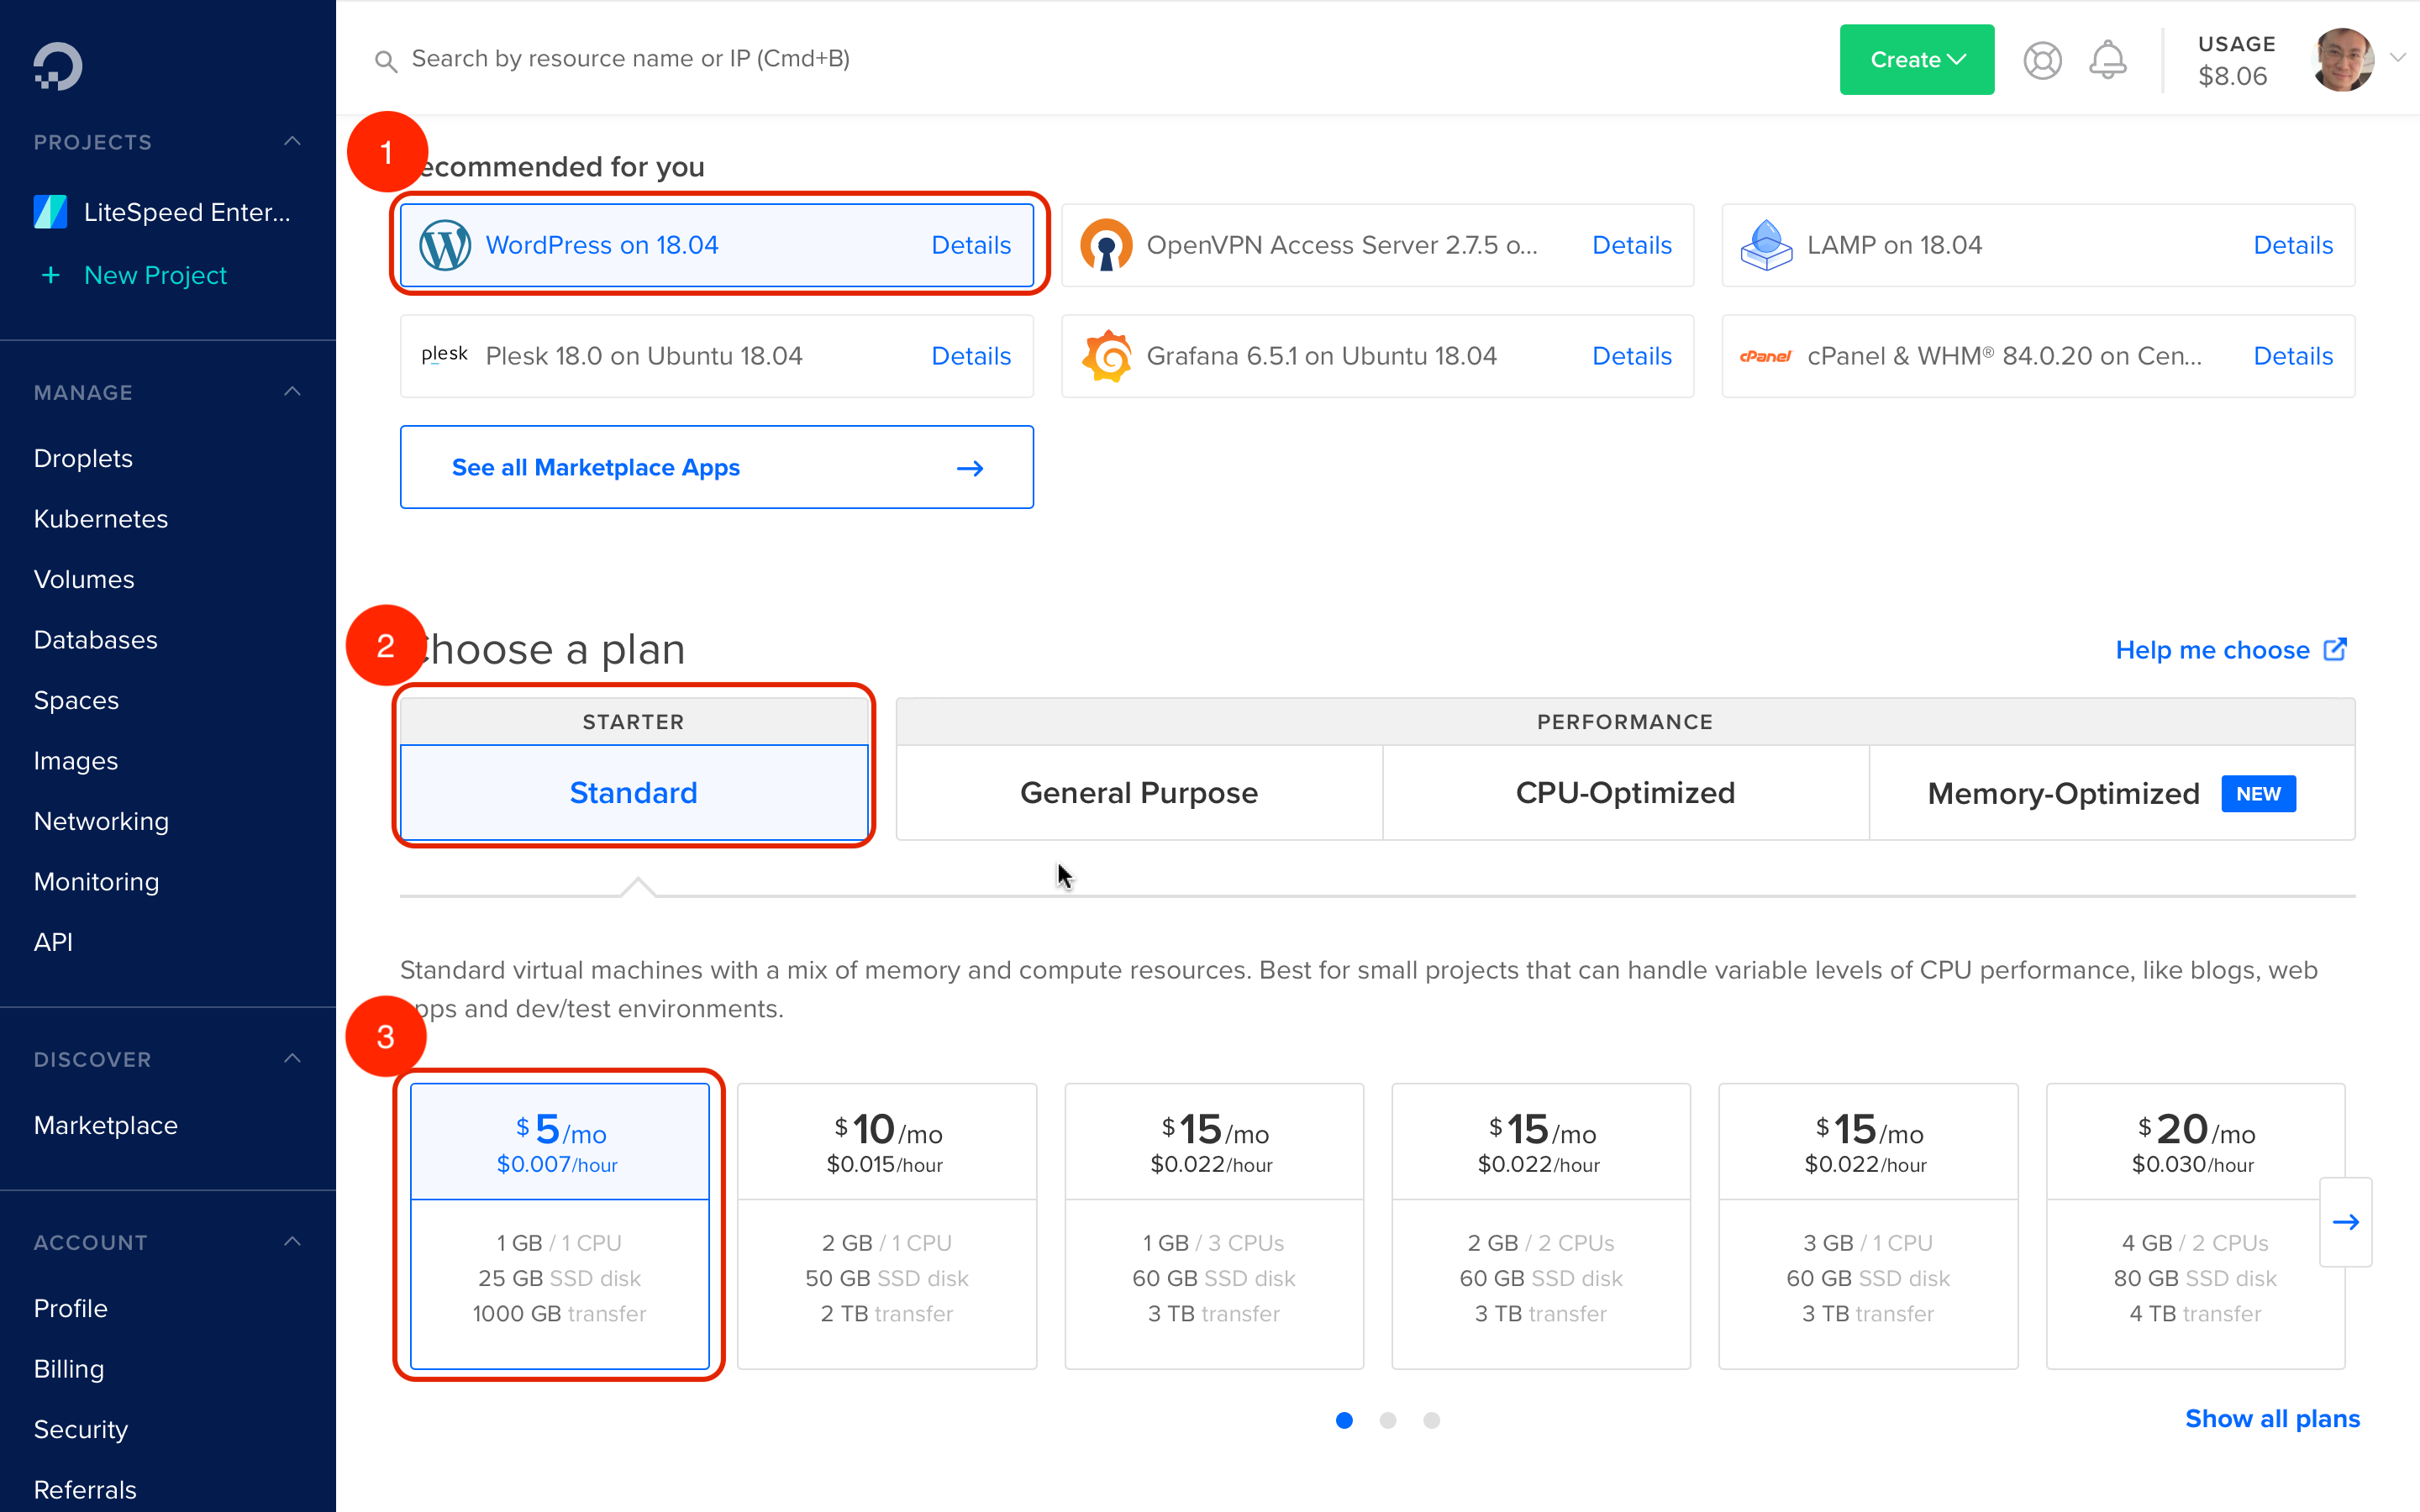
Digital Ocean’s VPS, also known as droplets, are charged monthly, with the most economical droplets starting at $5 a month. There are many apps that can be installed with one click, with WordPress being one of them. If your app does not appear in the marketplace, you can always install a Linux server and then install the app of your choice.
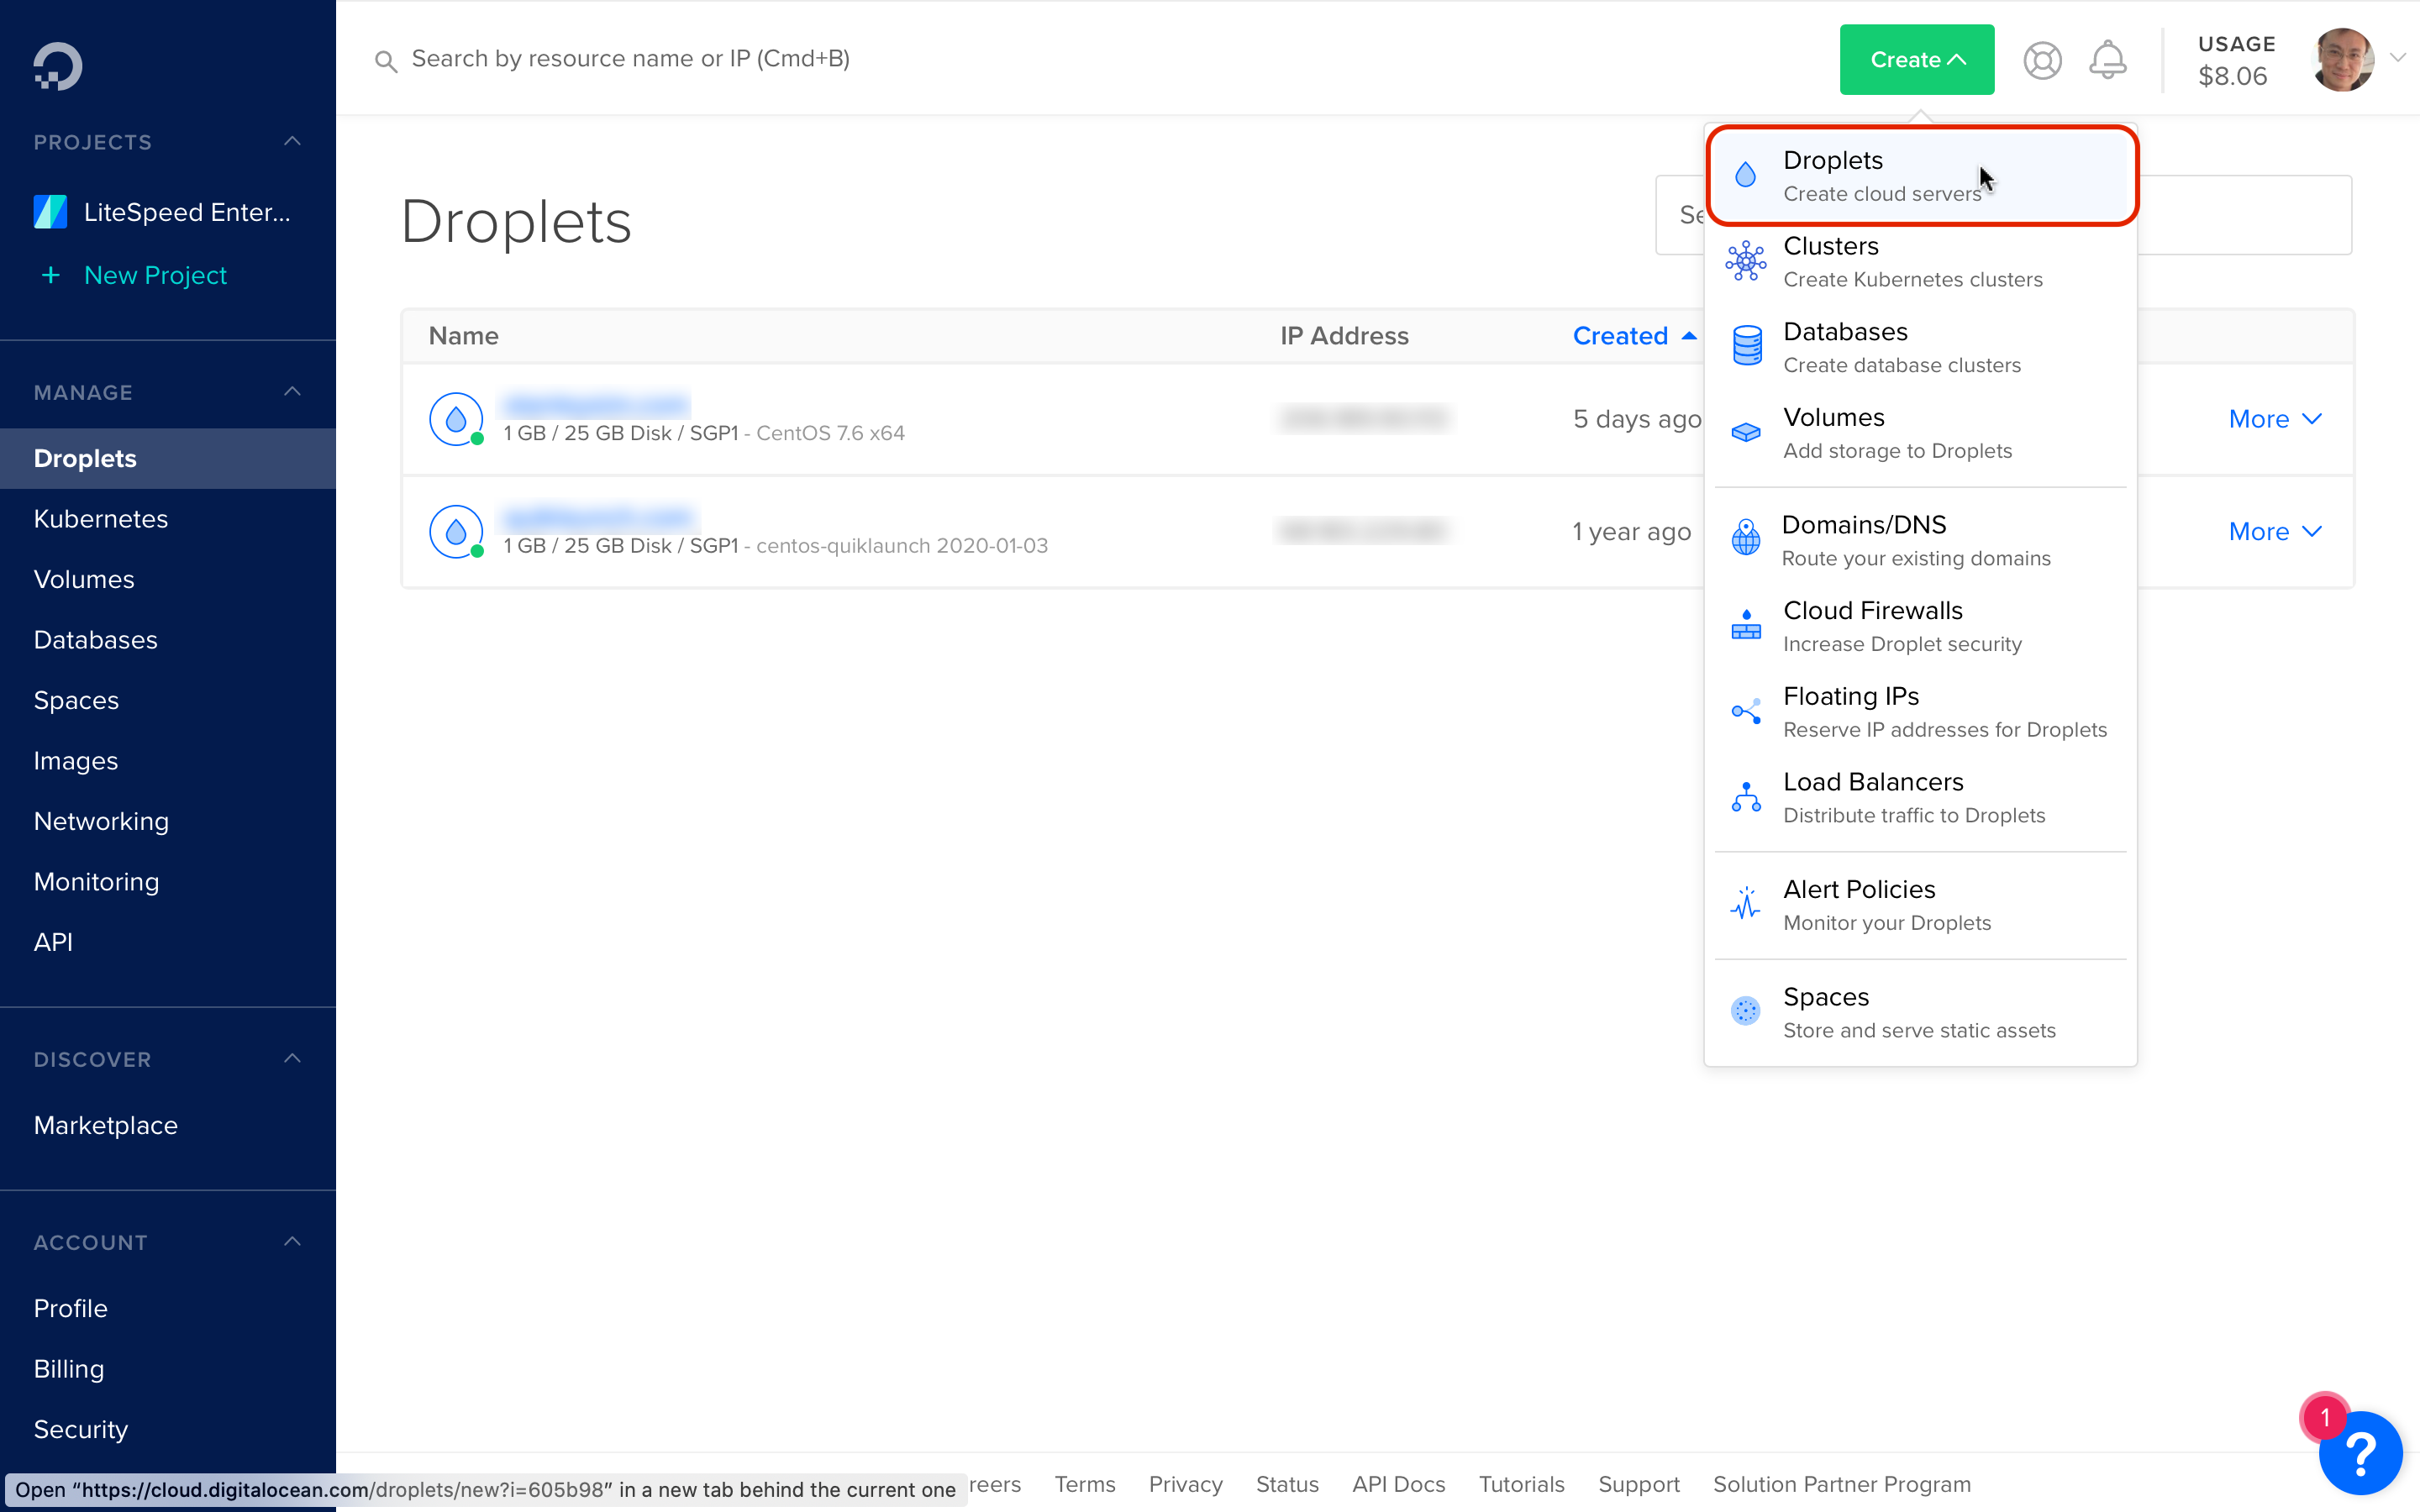
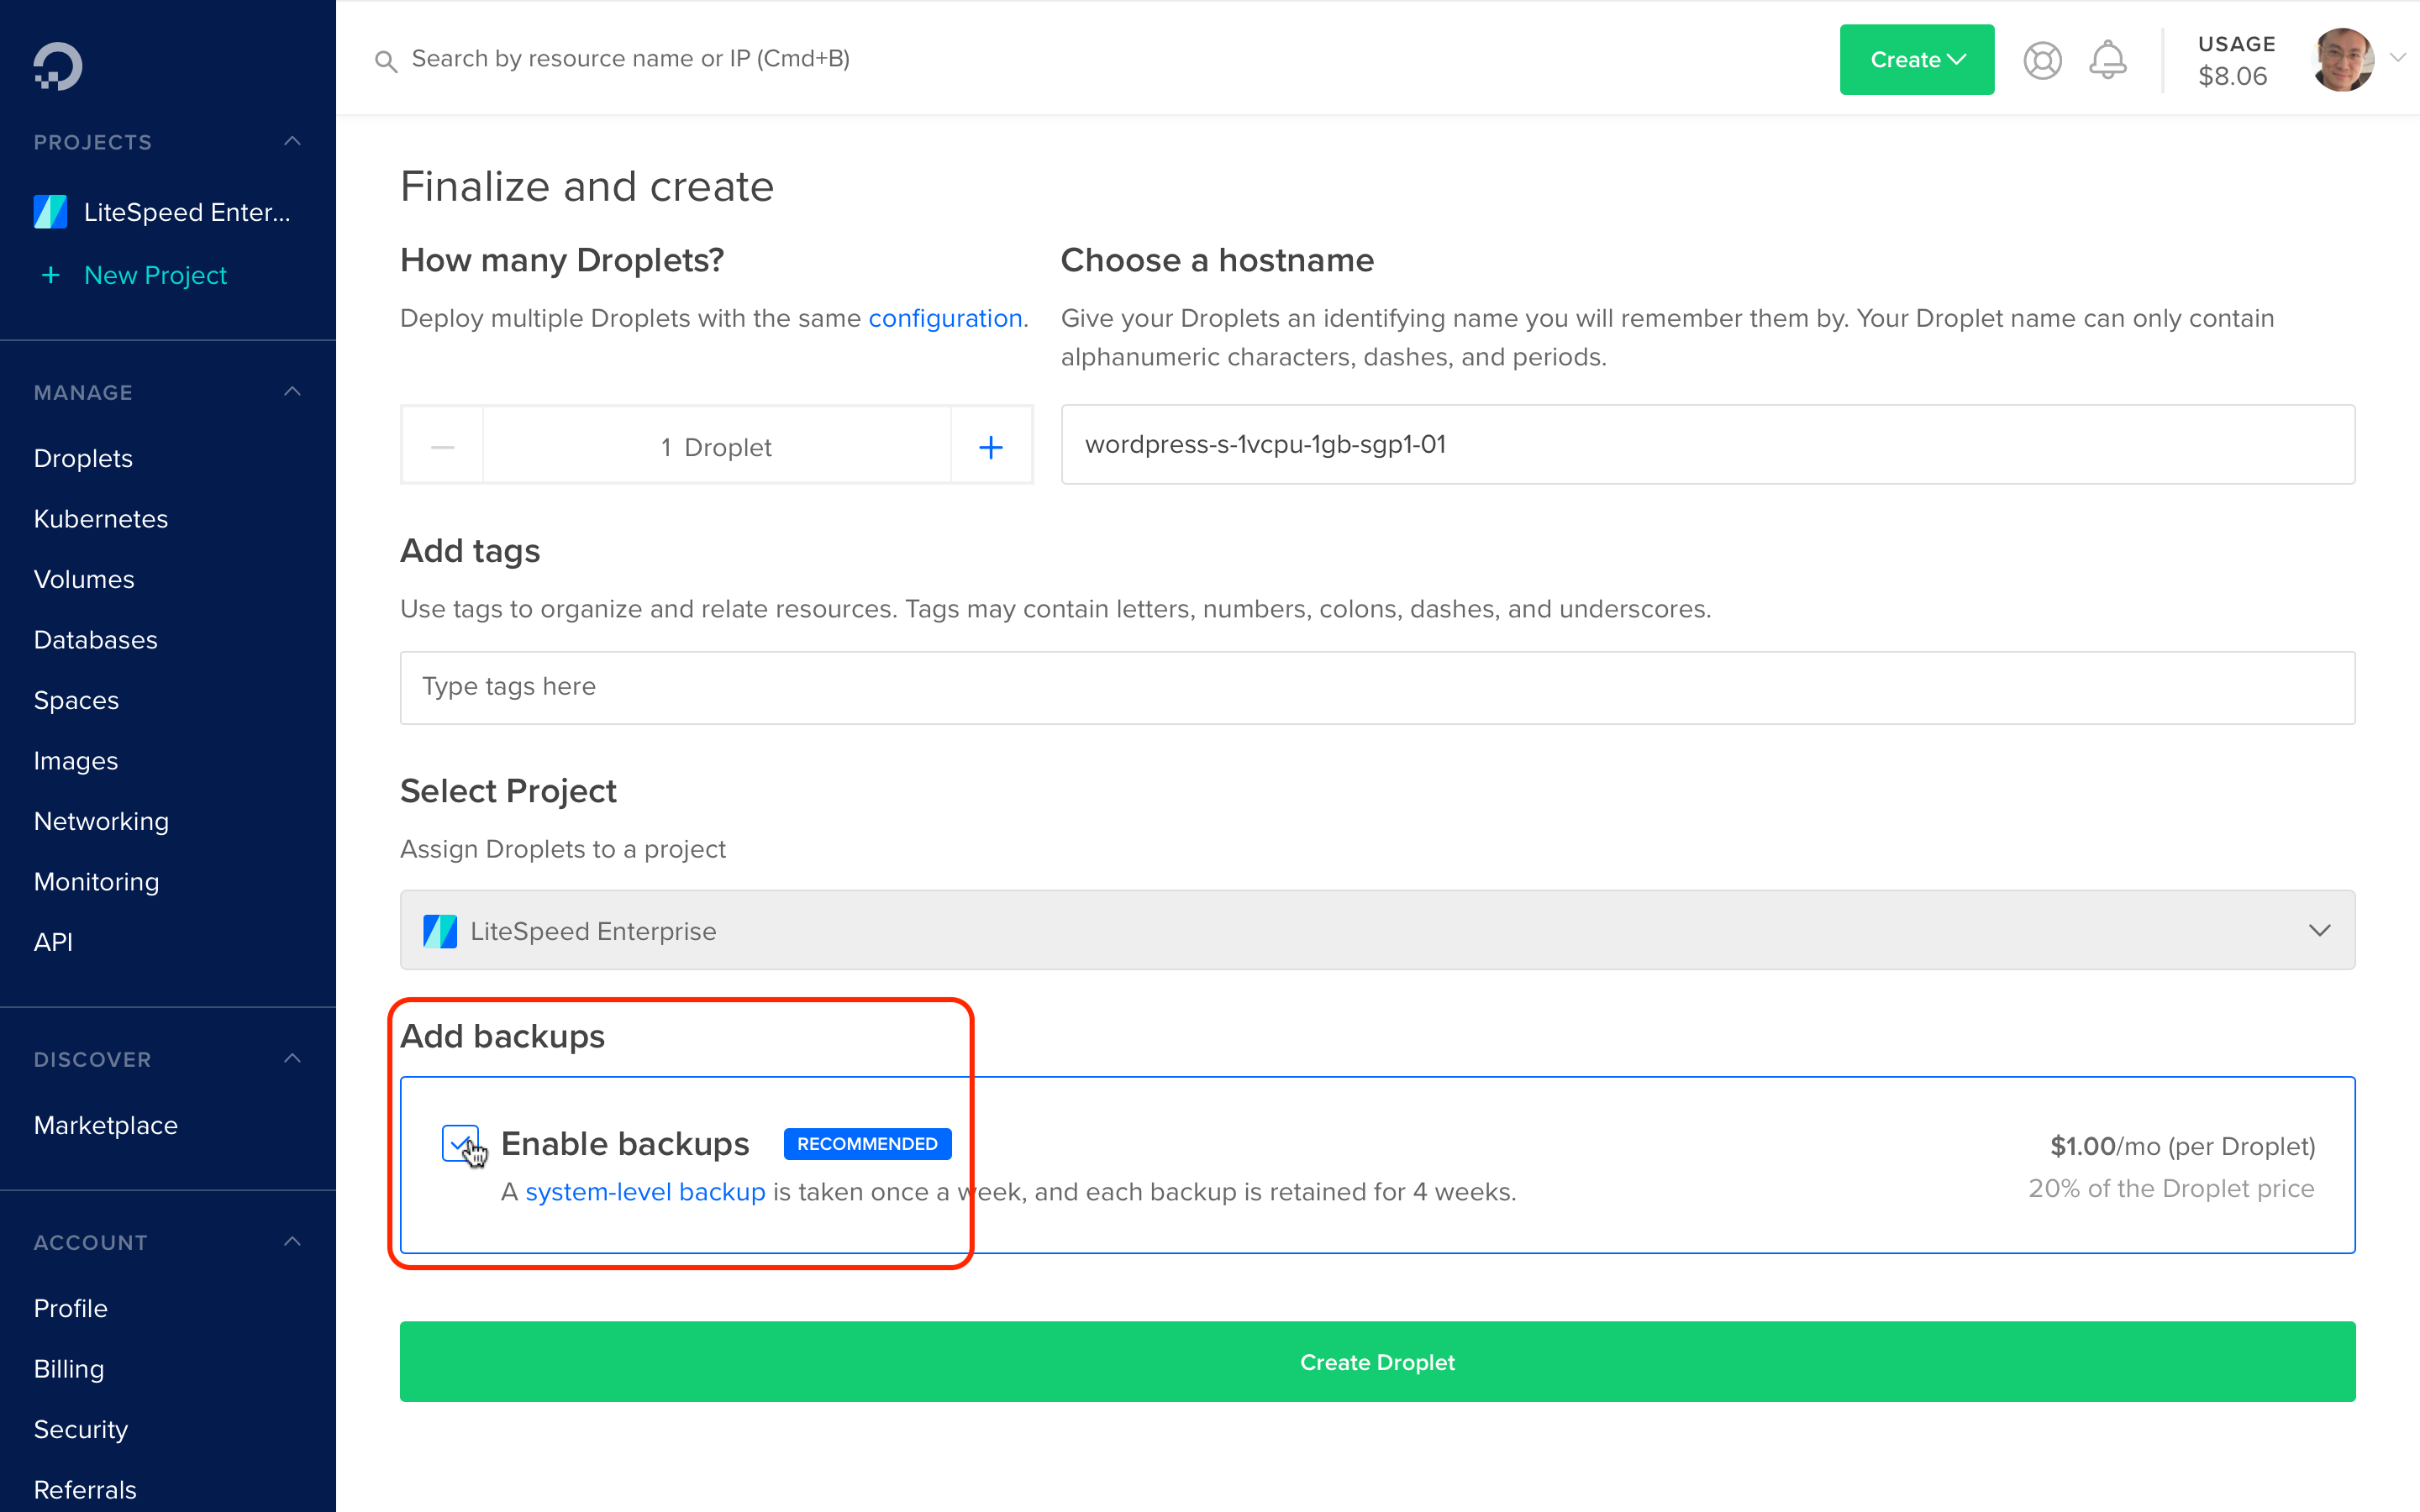
Installing WordPress from Digital Ocean’s Marketplace
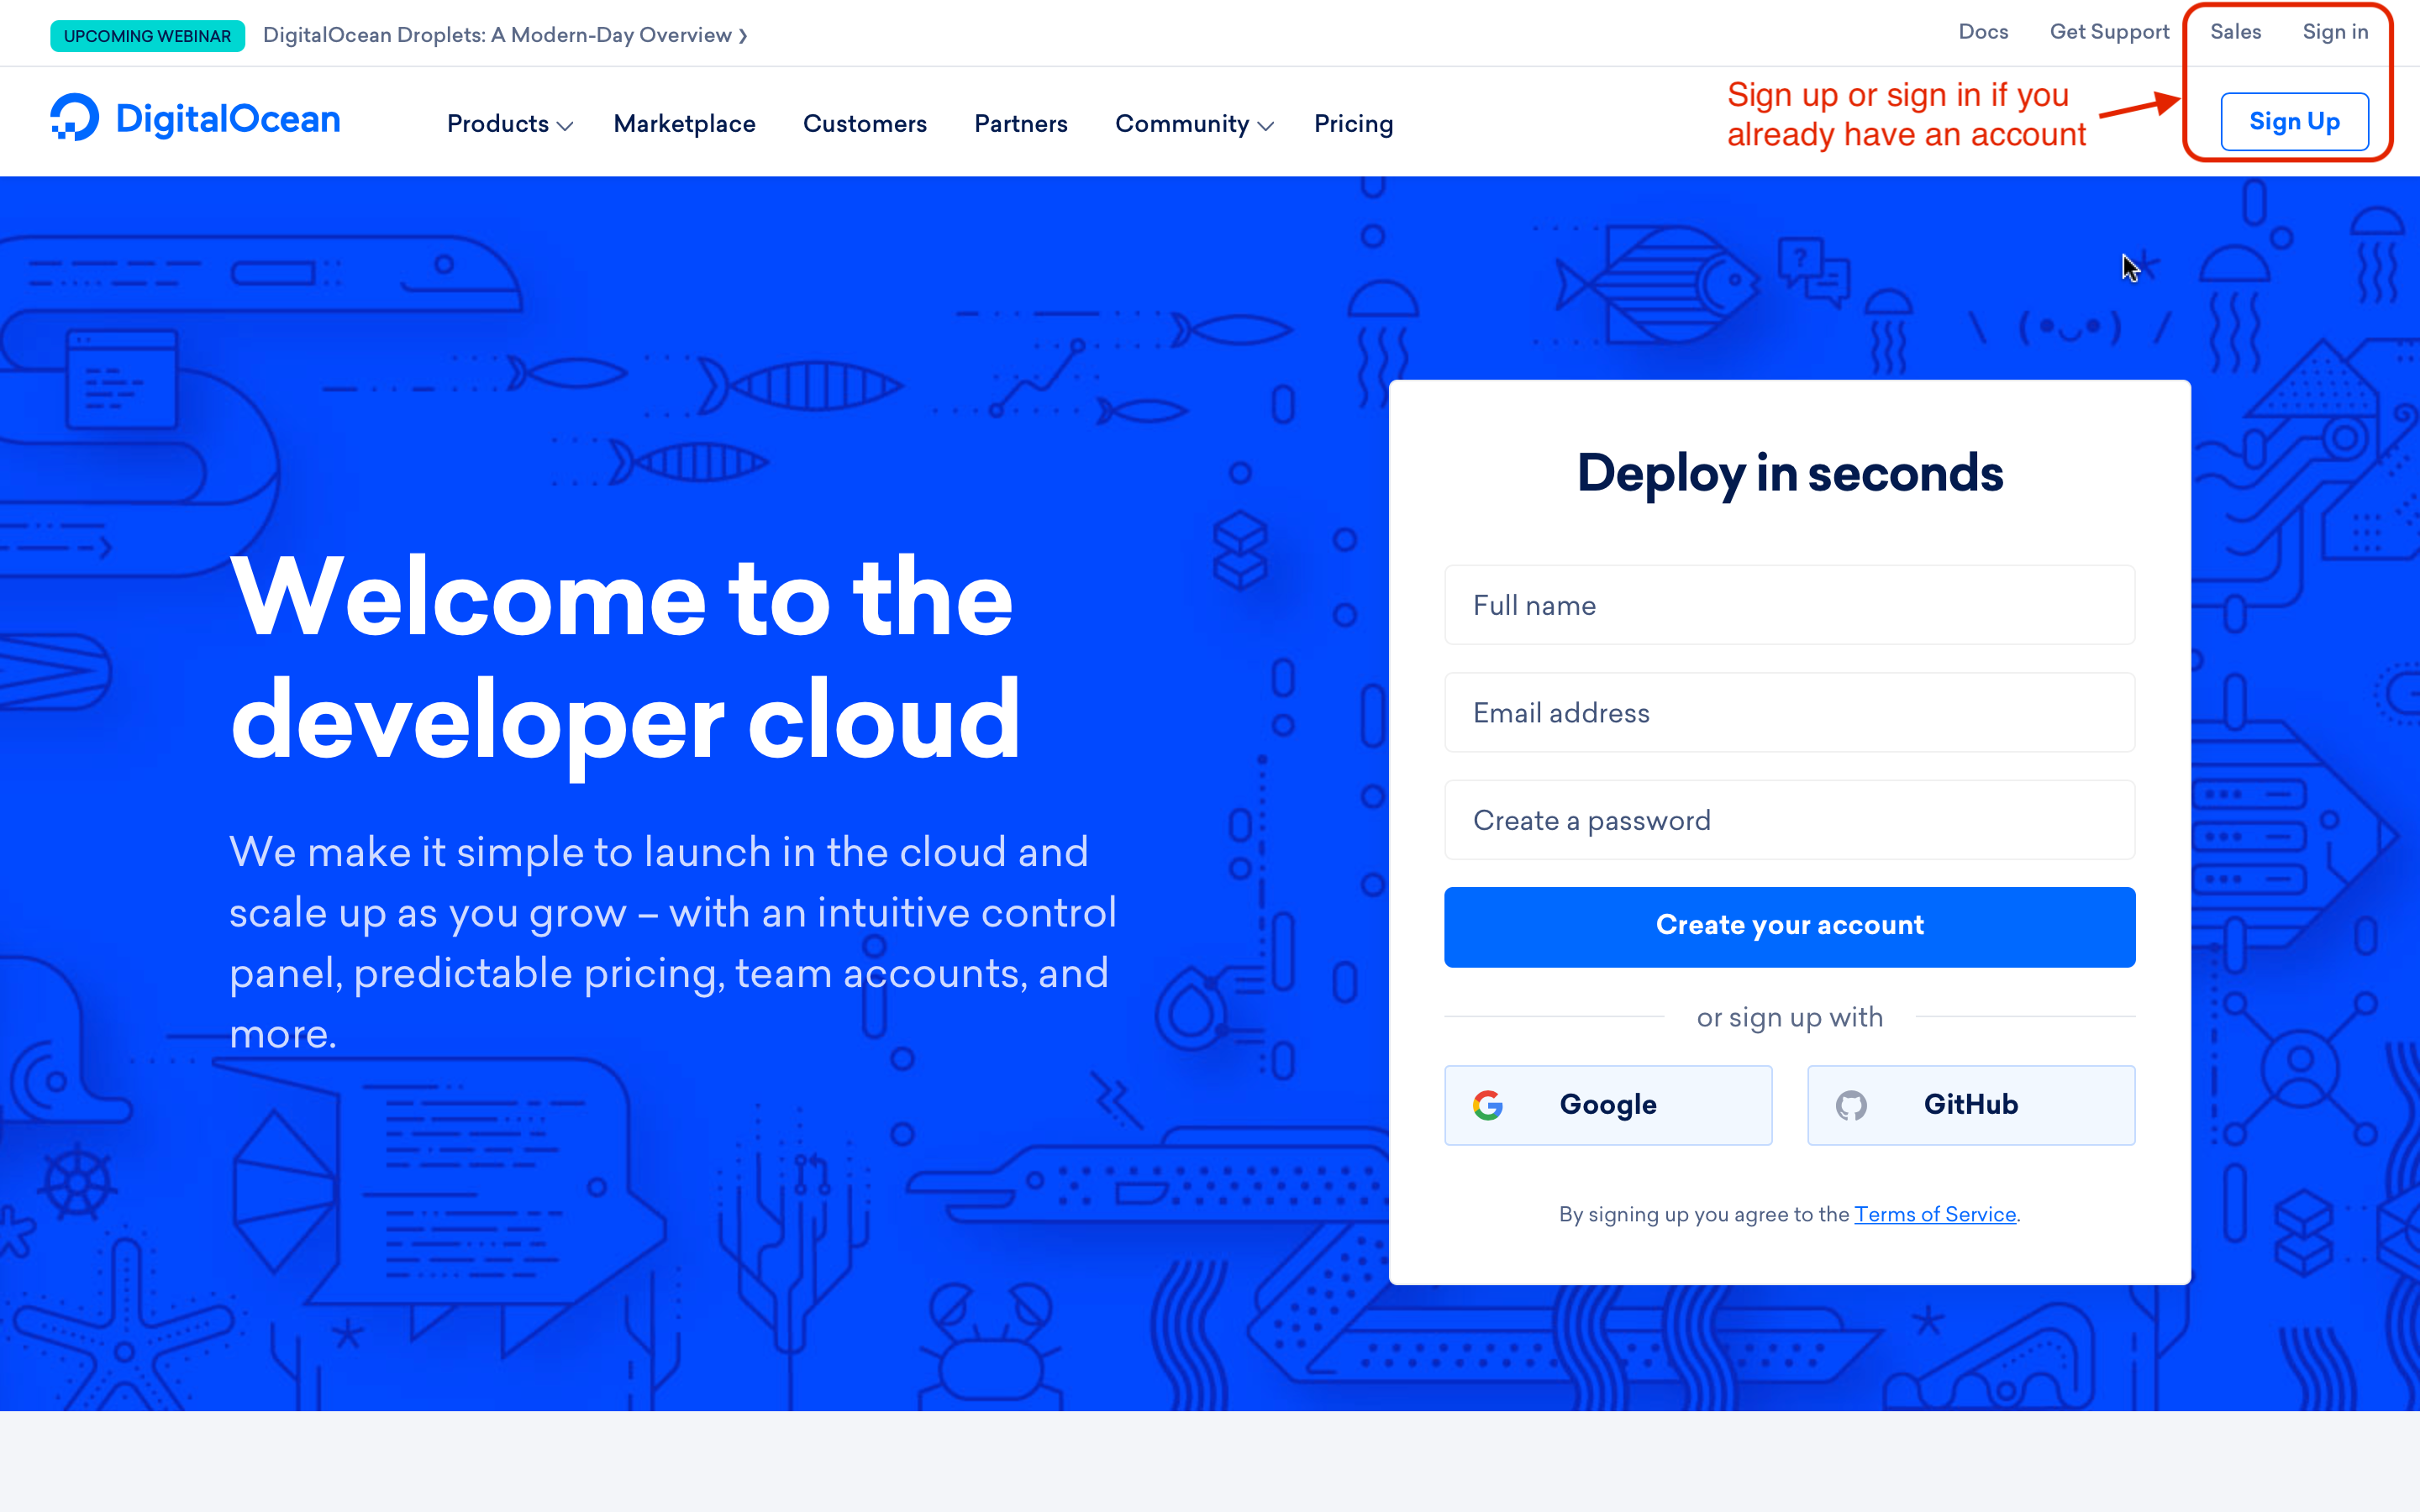
To start using WordPress from Digital Ocean, first sign up for an account in Digital Ocean.

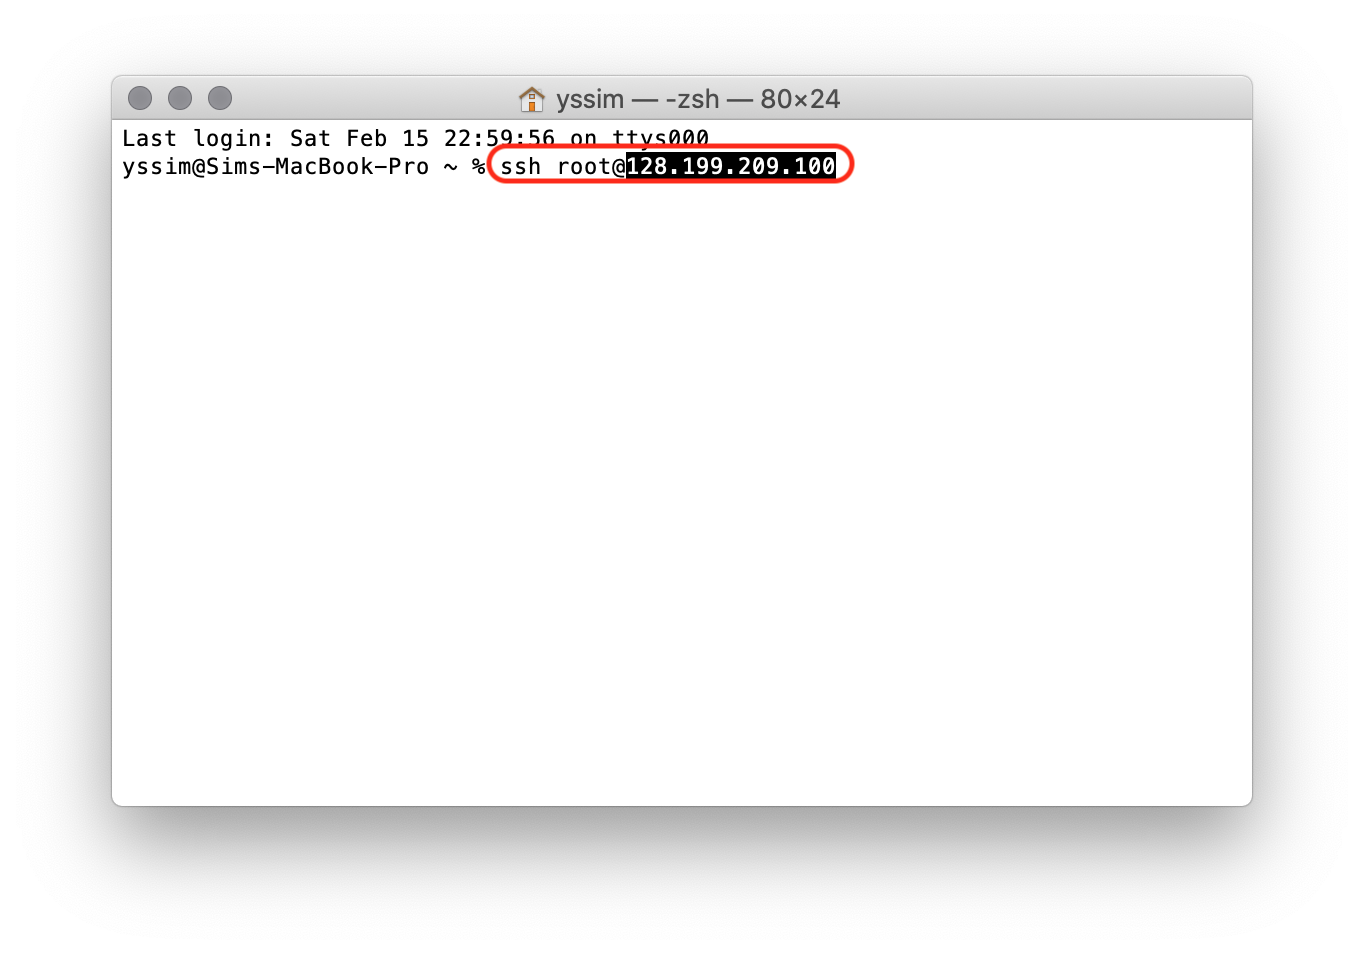
Setting up the WordPress instance with SSL from Let’s Encrypt
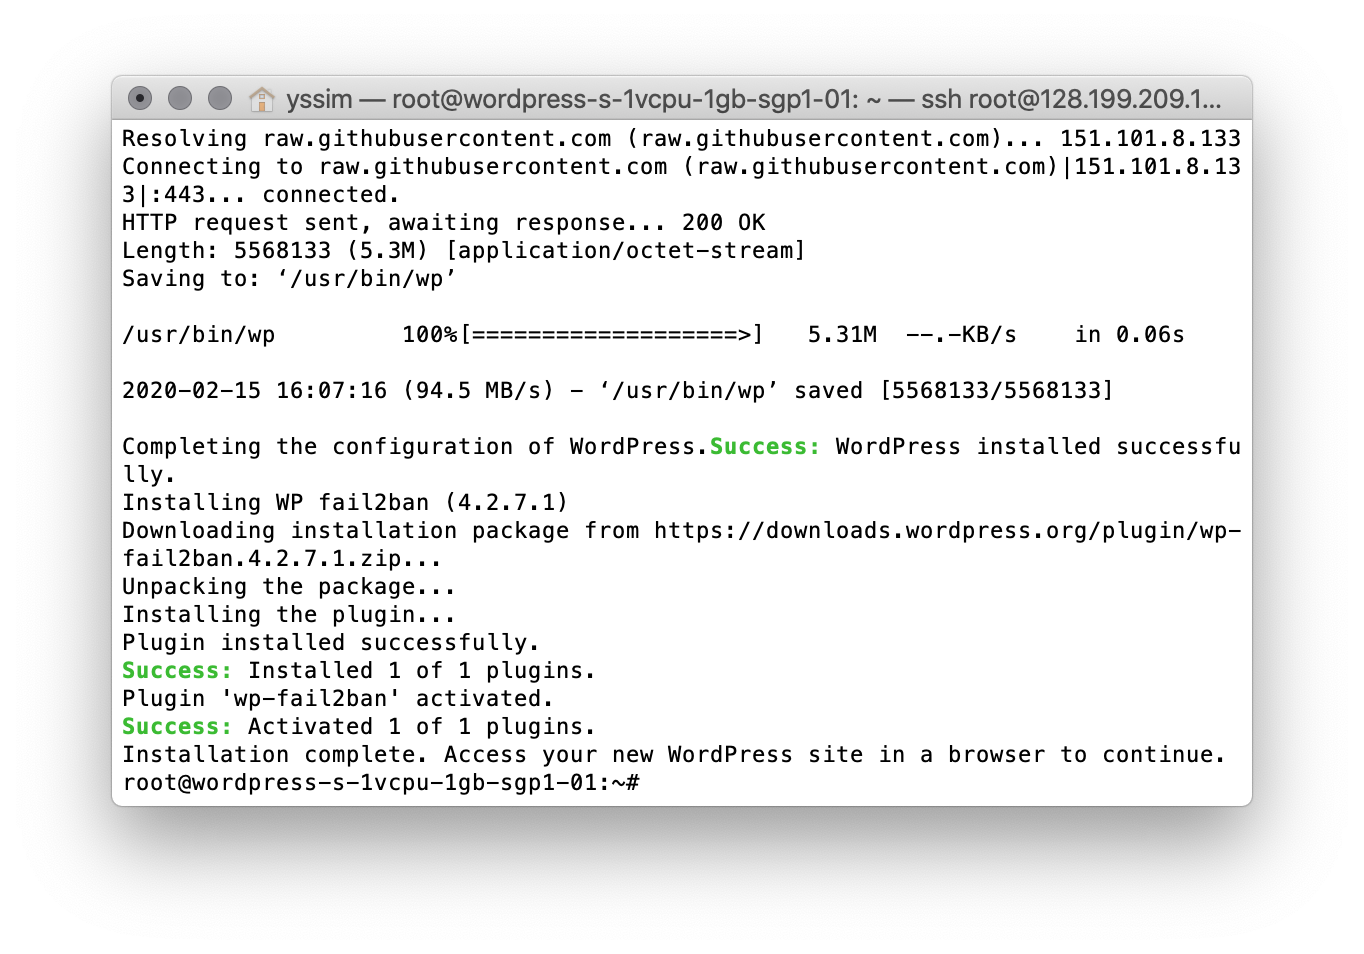
After creating the WordPress instance from Digital Ocean’s account, you will still need to access your instance via Terminal. With a Mac, you could use the built-in Terminal app to access your instance.
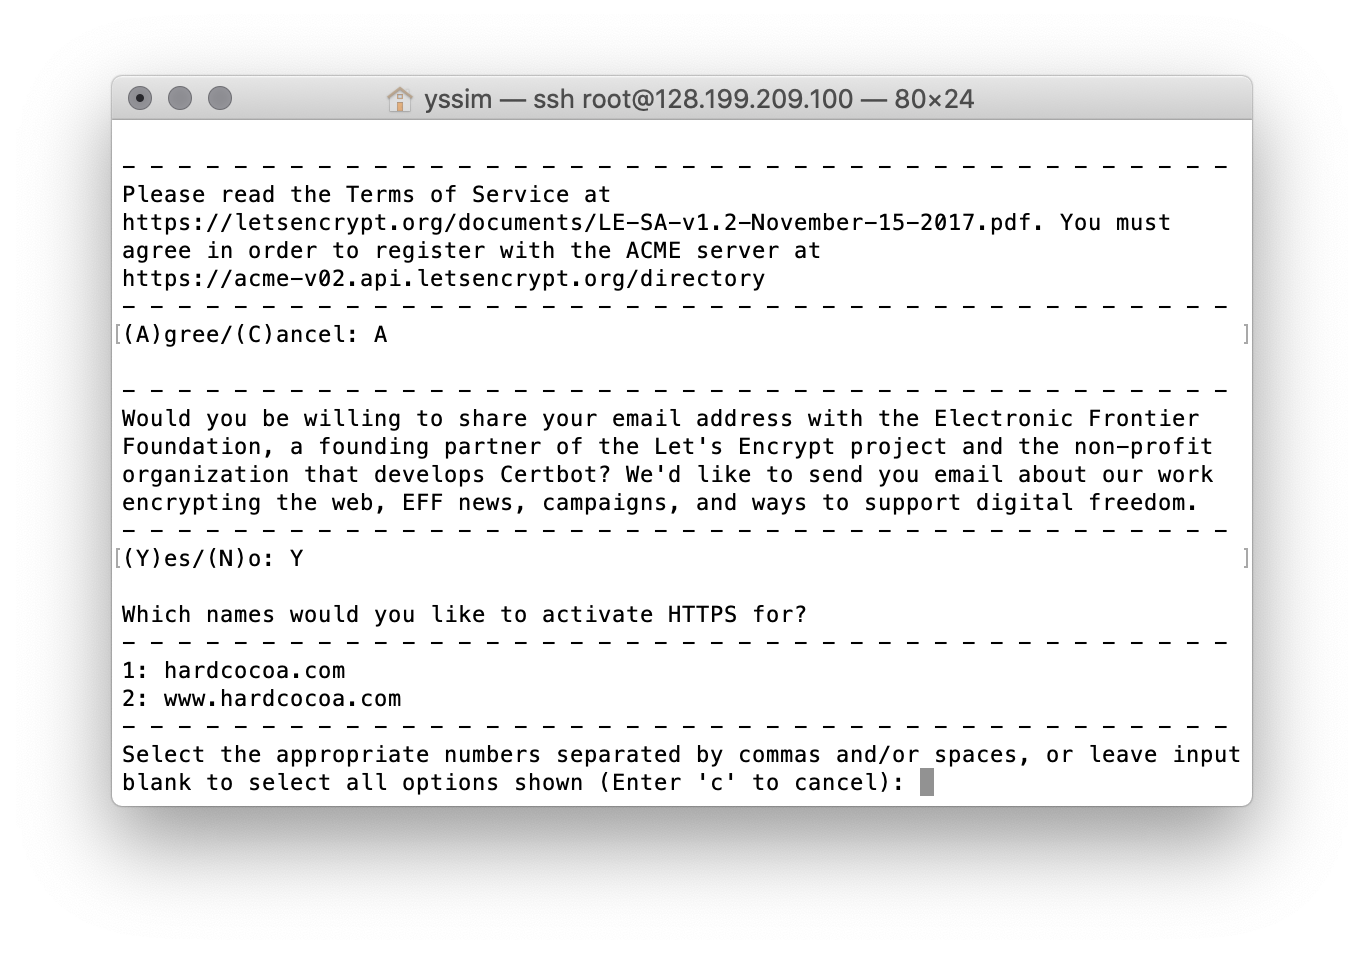
In addition, modern web browsers would gave a warning to the users if they tried to access a web site that was not encrypted. The warning might turn away potential audience from your site.
Let’s Encrypt provide free domain-validated SSL certificates to encrypt your site. You can easily obtain such certificates by following the instructions from the images. To perform this step, you would require to provide a Fully-Qualified-Domain-Name(FQDN) from a domain name registrar. You can subscribe to a domain name from Quik Launch.


Setting up the domain name
Before you website can be accessed through the domain name, you would need to set up your domain name registrar to point to your domain name servers.
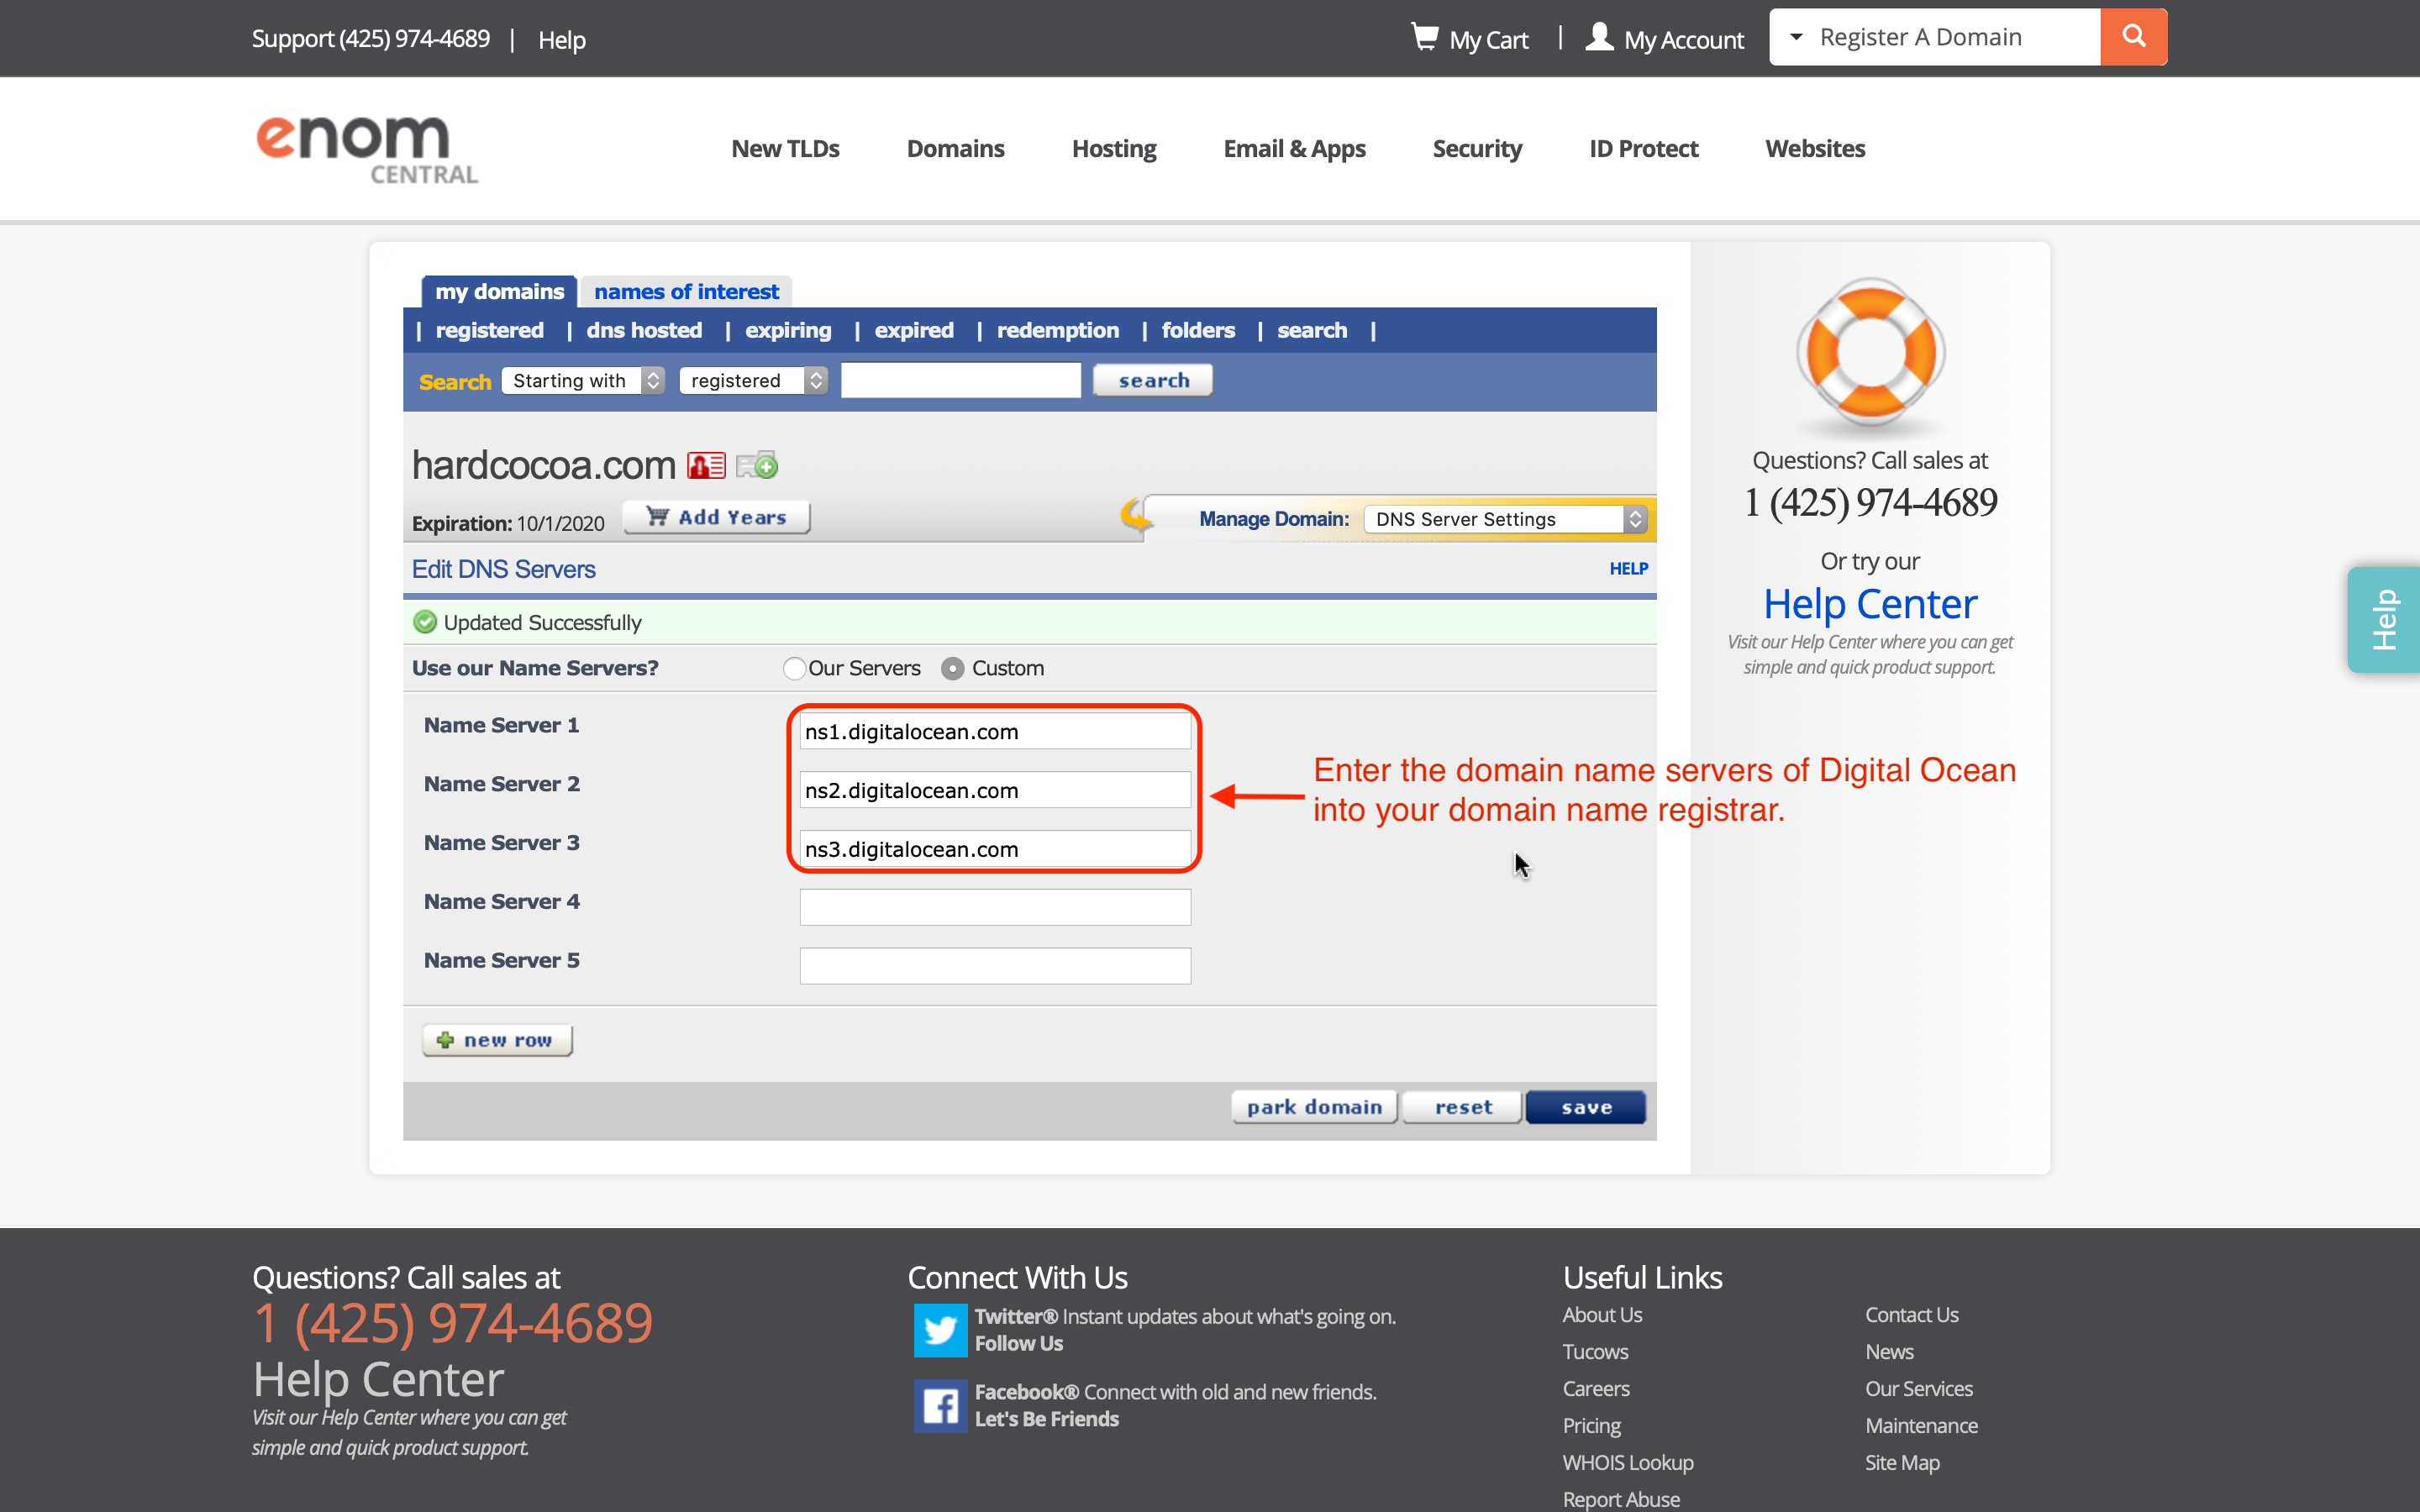
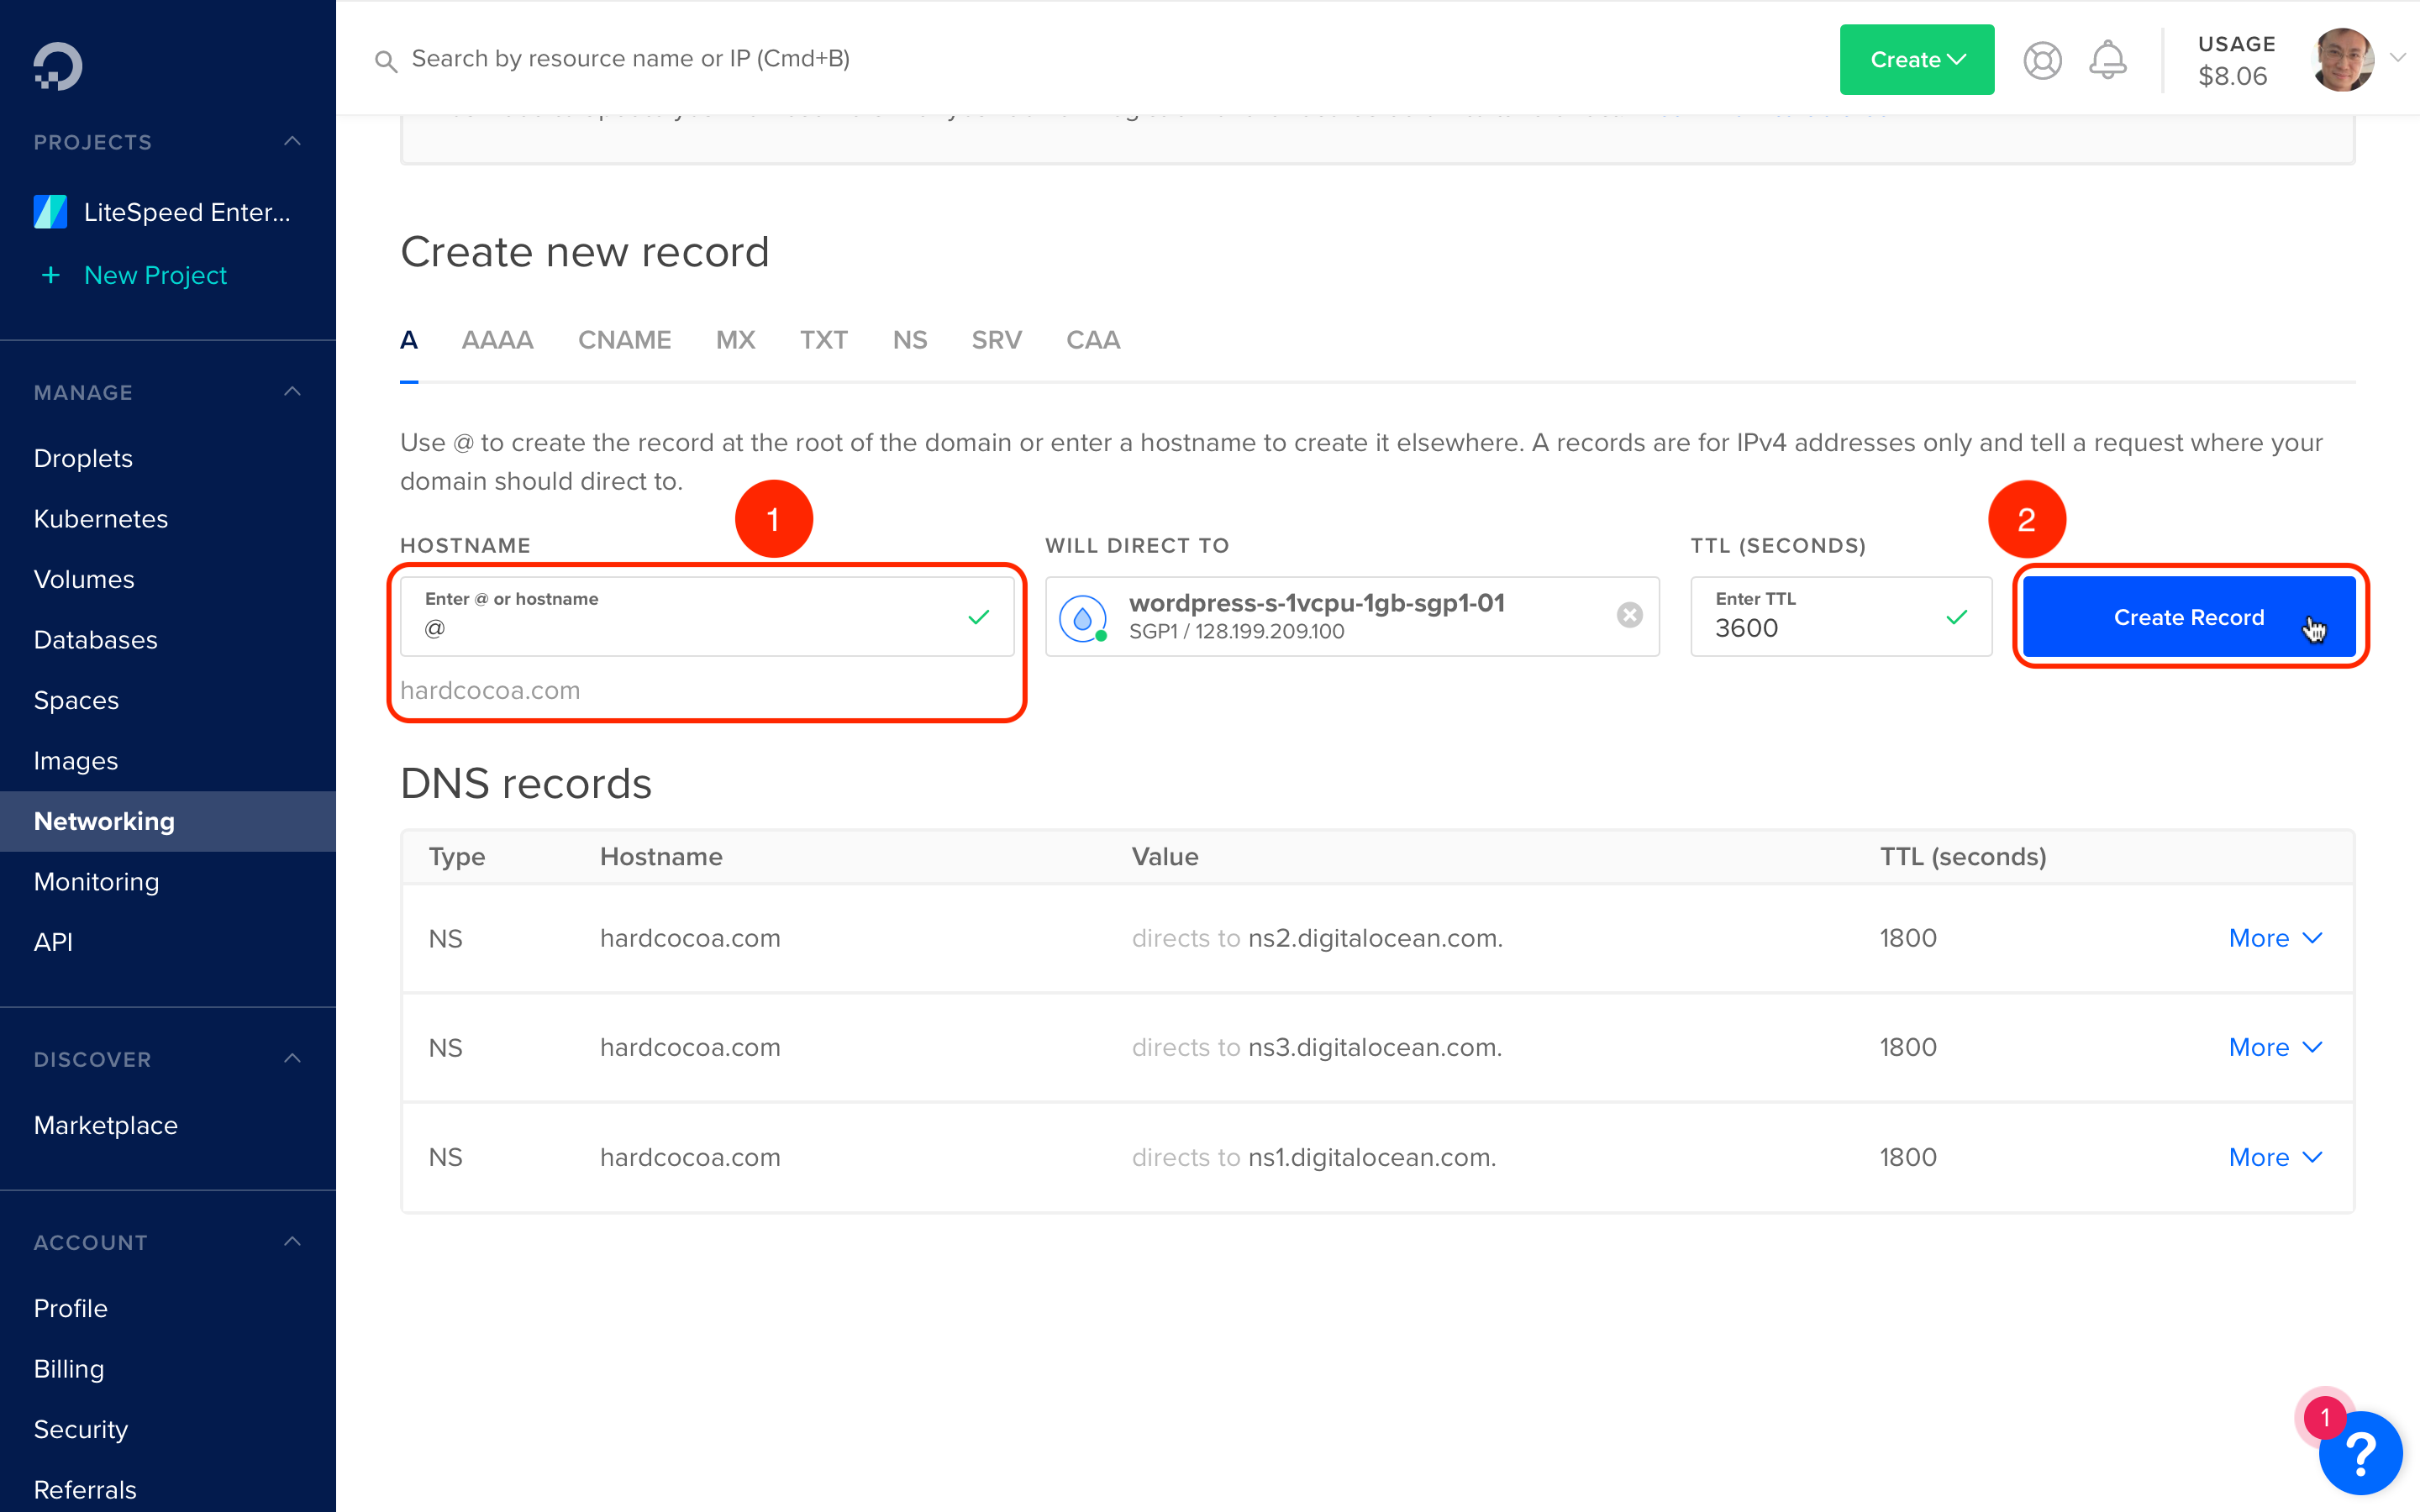
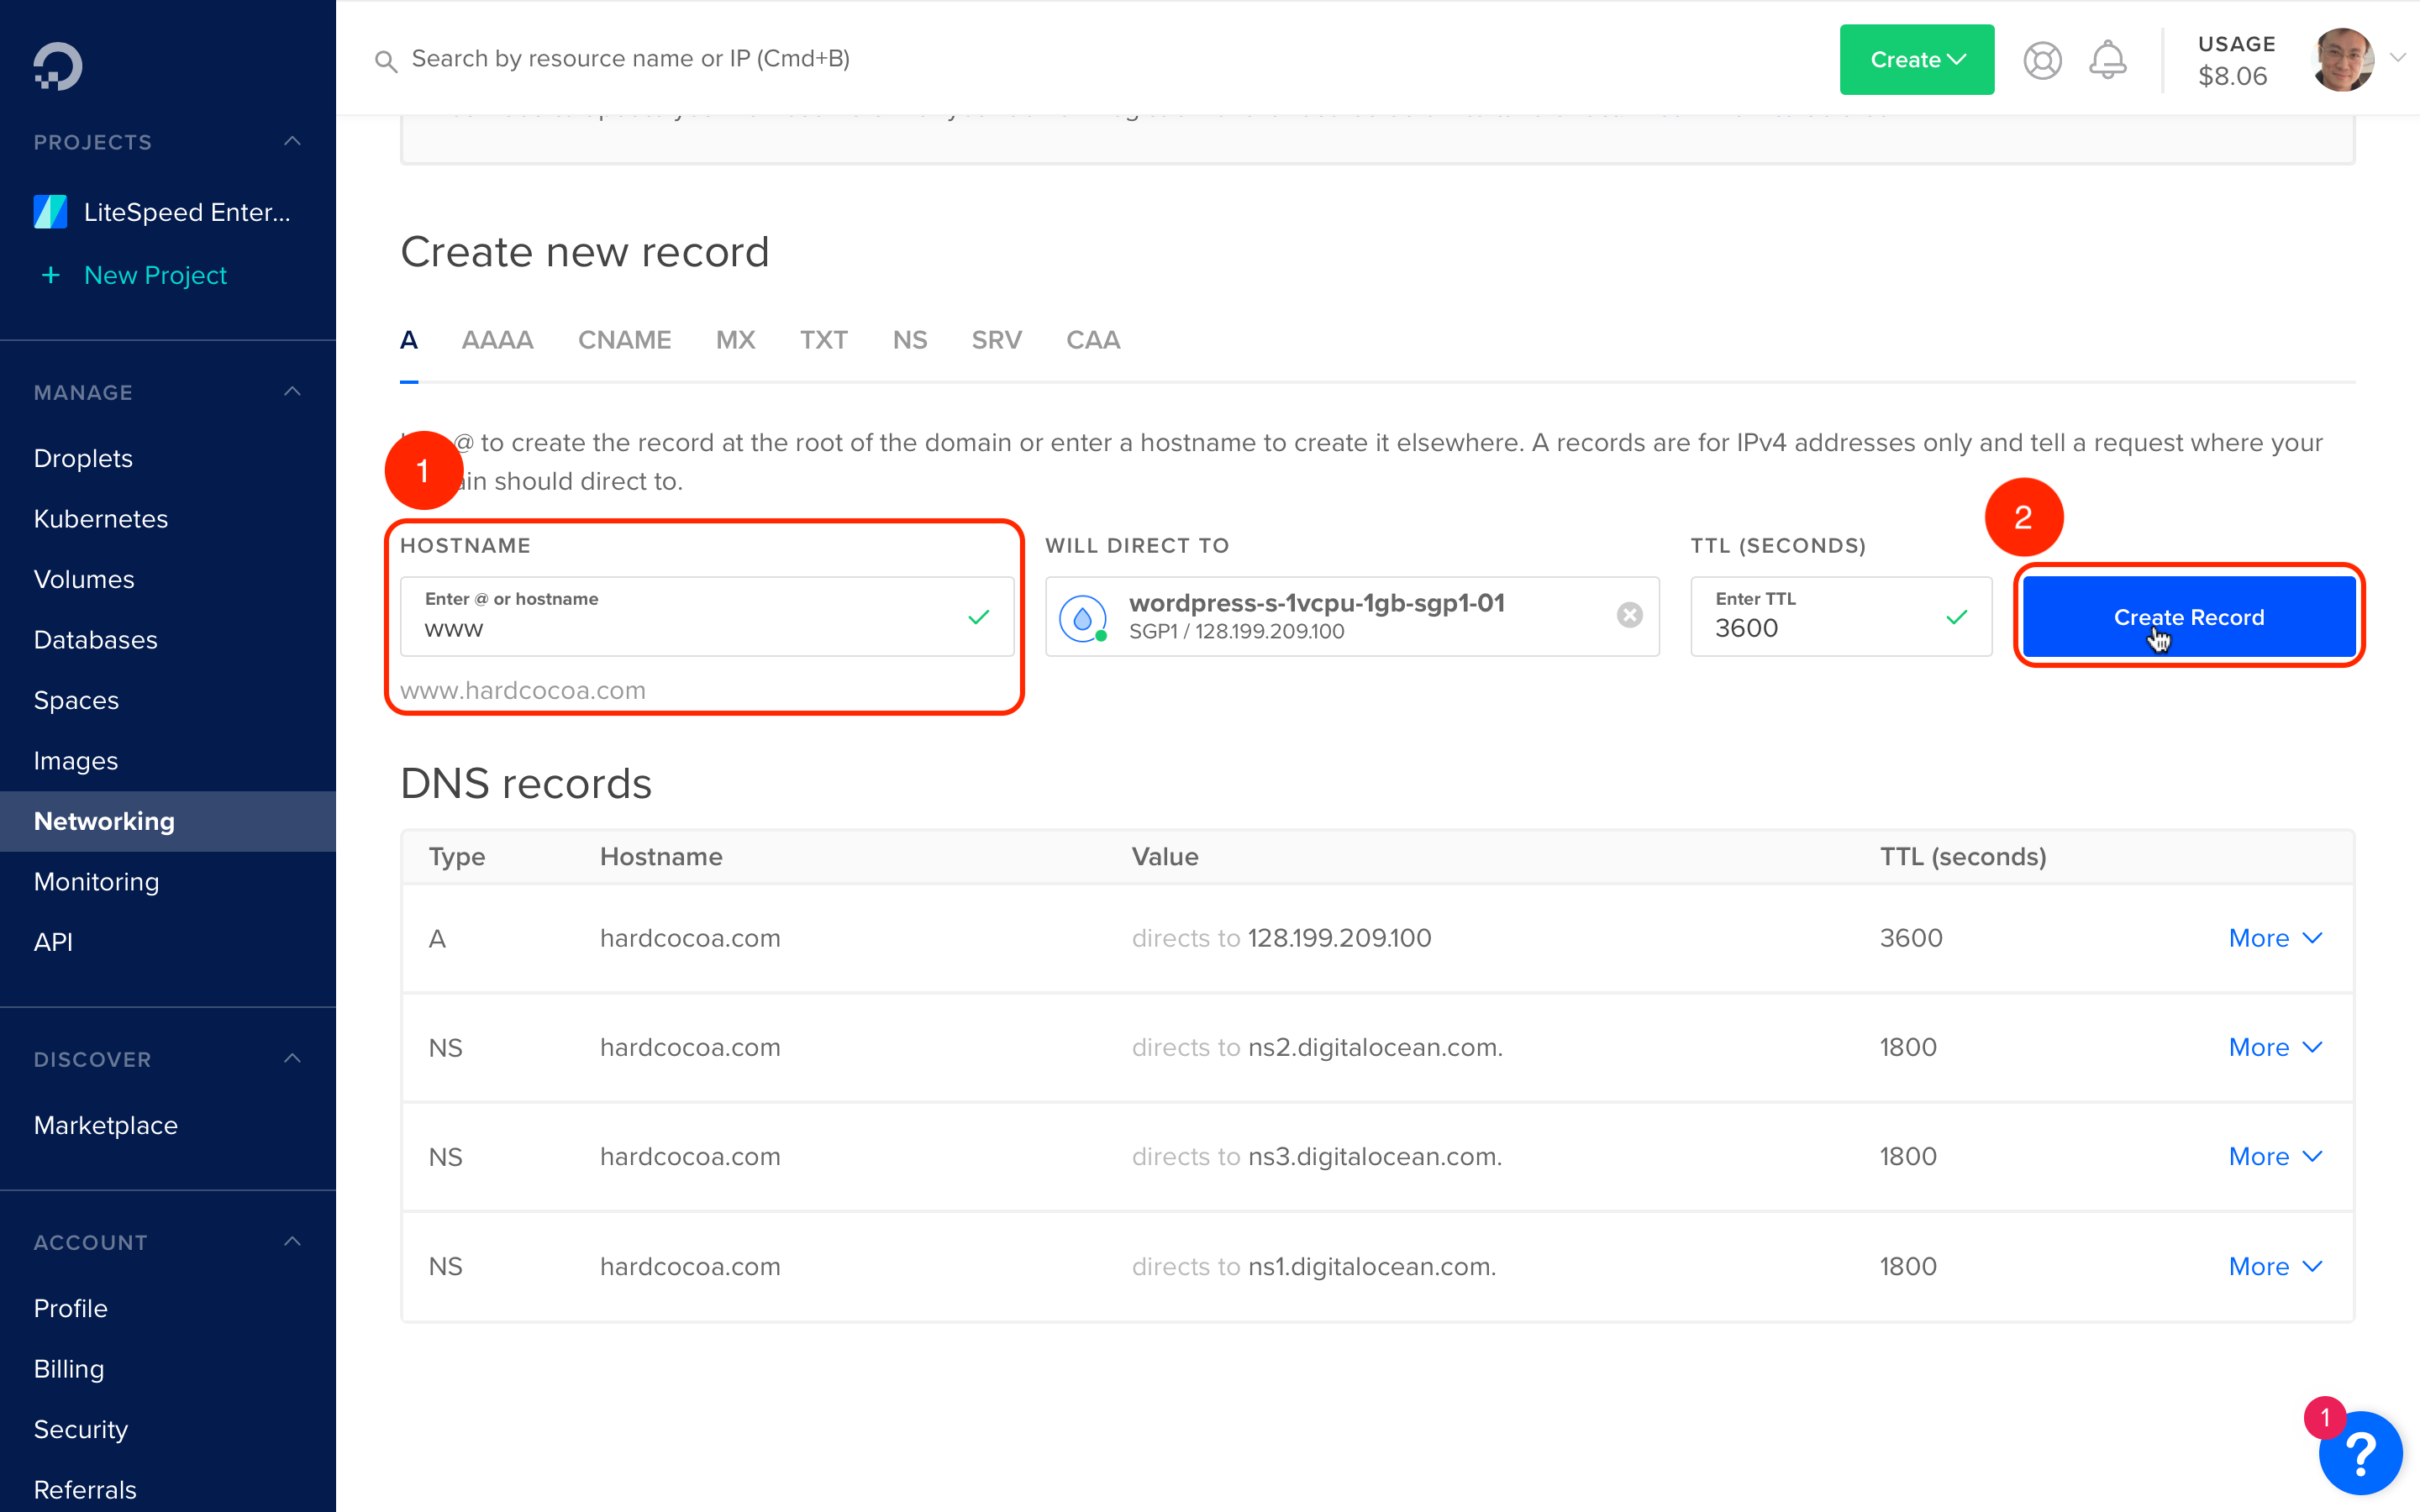
Once this is done, you may need to wait for 24 – 48 hours for the domain name servers to be propagated world wide. When this is done, you can access your site through the domain name.

You can own a WordPress VPS through subscribing from Quik Launch.