
Last updated on June 27, 2019
Coding is hard. To a beginner, all the code looks alike. A beginner will have difficulties identifying where to insert code when they follow the instructions from a coding book. This problem is compounded when many coding textbooks contain typo errors such that even when the learner follows exactly what the book wrote, the code simply could not run as expected.
As a trainer, it is often that we use long projects to showcase a combination of coding concepts. However, from the start of the project to the end, there are many intermediate stages where the learner may type wrongly and their code would not run. However, such stages are necessary for the learners to complete in order for them to continue with the next stages of the project. Source control, a useful tool that professional programmers use to develop software, is just an ideal tool for coding trainers to also use in training their students.
Source Control
A developer often needs to implement a trial feature on their code. He would need to branch his code from the master branch before writing the trial code. If the code works and is approved, he would merge the trial code into the master branch. In this sense, source control is exactly what a learner could use as he add code incrementally according to the coding book.
A popular source control is git, and GitHub is a popular choice among programmers. In this article, I will detail the use of git in Xcode and GitHub when teaching coding to students.
Setting up Git
When you start a new Xcode project, make sure that Create git repository is unchecked. We will add the git directory manually through command line.
To do that, you need to open a Terminal window and navigate to your project root directory by typing the command in the Terminal window:
cd /project directory/
However, you could simplify the typing by dragging the project folder to the Terminal window after the cd command.
Note that it is important to be in your project directory, as many students who are performing these procedures usually run the commands in their user directory. To check that you are in the project directory, type
pwd
Once you are in the project directory, type:
git init
Next, add the all the codes to your local git repo. . represent all the files in the directory.
git add .Next, to commit the codes in Git, you should enter these commands in a Terminal window of your project root directory.
git commit -m "Commit name"
git remote add origin git@github.com:username/new_project.git
You might need to change git@github.com to https://github.com/simyseng/new_project.git depending on the protocol you use to link your project to the remote GitHub. The difference between the two is that using SSH(git@github.com) is more convenient, but harder to set up. Using HTTPS requires you to enter User ID and password of your GitHub account, which make it less secure and convenient. For student use, HTTPS would be sifficient due to the convenience.
To finally push your code to the online repository (repo), use the command:
git push -u origin master Refresh your browser page of your GitHub project and you will see the code in the project page.
Exercise
Let’s try to create a new Xcode project and push it to the online repo.
Create a new Xcode project
Create a new Xcode project and name it ‘GitExercise’. Save the project to the Desktop directory.
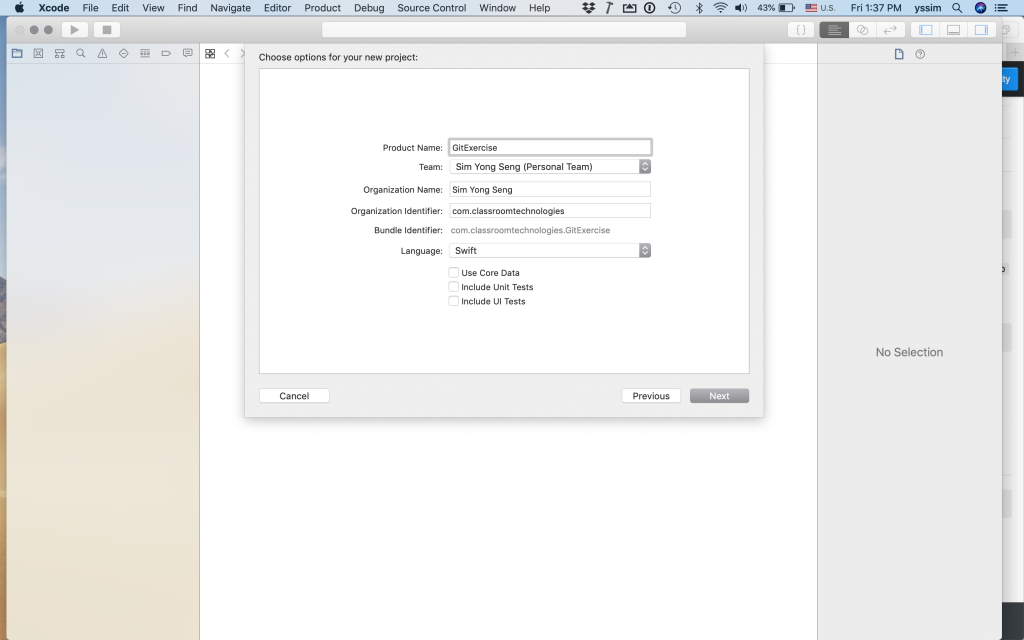
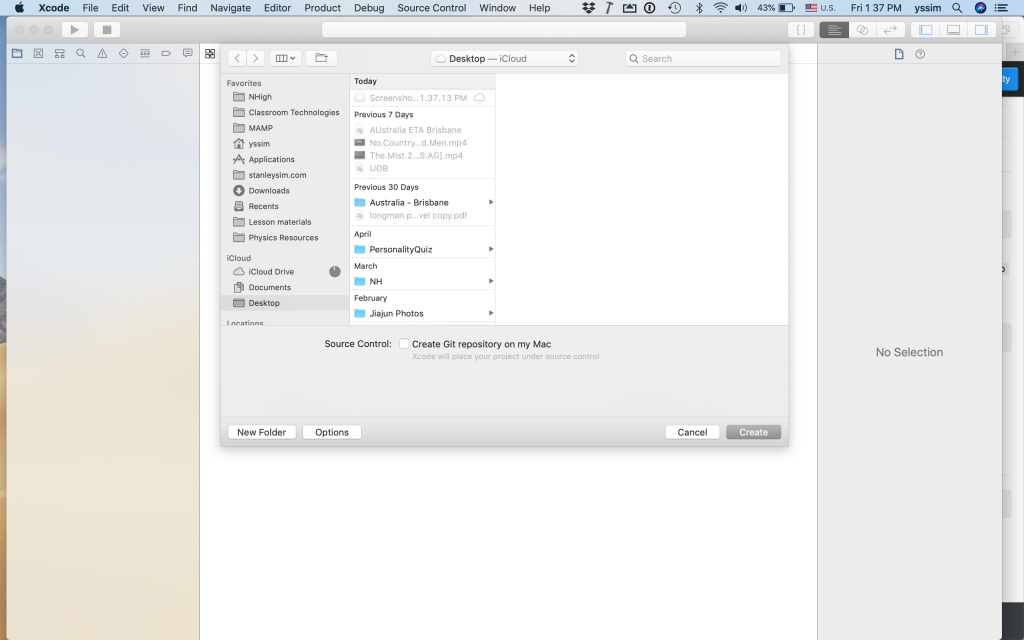
Ensure that ‘Create Git repository on my Mac’ is unchecked.
Navigate to project directory
Open up a Terminal window. Navigate to the project directory by typing
cd ~/Desktop/GitExercise/
It is important to execute your git commands in this directory. It is very common for students who are new to using Terminal to run git commands in their home directory.
Git procedures
There a four general steps to get your codes into GitHub. They are
- initialise a git directory
- add files to the git directory
- stage your files to the git directory
- The fourth step is to get your code onto your online GitHub account. This step has a few substeps.
- create a new project in your GitHub account by using your web browser.
- create a link between your local git directory and the remote online git repo.
- push your codes to the online git repo.
In your project directory (within Terminal), type these commands.
git init
This step initialise an empty git directory in your project directory.
git add .
This step adds all the files in the project directory to a queue to be committed later.
git commit -m "First commit"
The step commits the files in the git directory. -m create a message to describe your commit.
The next step is to create a project in your GitHub site. Using your internet browser, navigate to https://github.com and create a new project. Call the new project GitExercise. After the project is created, note down the URL of the repo.


Now, create a link between your local git repo and the online git repo.
git add remote origin git@github.com:simyseng/GitExercise.gitor
git add remote origin https://github.com/simyseng/GitExercise.git
This step links your local git directory to the online GitHub repo. You should choose the former if you are linking them via SSH and choose the latter if you are using HTTPS. If you are unsure, choose HTTPS (the latter).
origin is the name of the remote repository that you use to identify in GitHub. This is the usual naming convention so I would suggest you to use it as well.
Finally,
git push -u origin master

This step push the files that you have commited to the online repo master branch of origin. If you create alternate branches, you will replace master with the name of the branch.
Conclusion
After a while, your code would be pushed successfully online. Go back and refresh your GitHub project window. You will see the codes in your project page.
